Our new and improved site

(with the same content as this one, AND MORE!) is

www.The SharingGardens.blogspot.com/

Friday, May 4, 2012

Grass Clippings and Leaves for Fertilizer/Mulch


photo: Muhammad Sajjad
Turning over a new leaf
Leaves, grass clippings and other yard "waste" make excellent fertilizer for garden soil. We have been demonstrating this at the Sharing Gardens with vegetable yields in the tons (2012 Harvest Totals). My husband Chris also demonstrated a great increase in fertility using yard "waste" on his 5-acre farm in the high-desert country NE of Mt. Shasta, California (back in the 1980's - '90's). Within a short amount of time, using only leaves and grass clippings, alfalfa-powder that he collected from the floor of a pellet mill nearby, and a modest amount of goat and chicken manure from his own livestock, Chris turned volcanic soil, the consistency of beach-sand, into a garden that inspired Organic Gardening Magazine to write an article about him called "Defying the Odds on a High-Desert Oasis" (March 1991). Chris' gardens were so bounteous and beautiful that his farm was nicknamed "Findhorn West!"

Feed your worms and other "micro-livestock" directly in the soil!
We have already written several posts that go into great detail about the simple methods we use at the Sharing Gardens, using local materials, to increase fertility (links below). In essence, our method is to feed the soil with leaves, lawn-clippings, spoiled hay and vegetable scraps, weeds and the plants we pull at the end of the season to feed the "micro-livestock" (worms, bacteria and other "composters"). As these garden-partners eat their way through the yard and garden "waste" we provide for them, they fertilize the soil with their manure and create minute tunnels that keep the ground from compacting.

Organic Matter, the "The First Amendment"
As our dear friend, James Cassidy (professor of Soil Science at Oregon State University) likes to say about soil health, no matter what challenges you are facing, the answer is always "add organic matter!"

Here is a step-by-step guide to one of the methods we use at the Sharing Gardens to increase the fertility and tilth of the soil using a lot of grass clippings combined with dry leaves.

Two to three weeks before planting in a bed, spread a layer of leaves and grass clippings and till them in.

1. Thinly distribute dry leaves over the surface of your grass. You want there to be more grass clippings than leaves in your final mix. It'll be much easier to do with dry leaves saved from the previous Fall.
Maple and fruit trees have thinnest leaves that break down quickest. Avoid walnut leaves as they will make your soil toxic to your seedlings. Oak and other thicker leaves work fine -- just mix in more grass clippings than with thinner leaves.

2. Run the mower over the leaves/lawn, using a catcher-bag to collect them. Set mower at a higher setting. Sometimes you may have to lift and lower mower to avoid stalling.
3. Distribute them about 1" - 2" thick in garden beds. You can till first, or lay the grass/leaves out and then till them in.

4. Till grass/leaf combo into the soil passing over the bed two to four times to work them in well.
5. Worms and soil organisms will decompose them enough in 2-3 weeks for you to begin transplanting.
6. Stand back and watch your vegetables grow!
You don't have to spend lots of money on soil amendments, to yield beautiful results!
Note: if you use plain, fresh grass clippings (no leaves), they can be quite hot, if laid on thick. If used as a mulch around plants, be sure they don't actually touch the stems or leaves of the plants.
John mulches lettuce and broccoli using fresh grass-clippings.
Other related posts from the Sharing Gardens:
Preparing Garden Beds - One Low-Tech Way

Hay-Bale Compost

More on Mulch

Mulch We Love, and Why 

Benefits of Deep Mulching

CLICK HERE for article (from your Organic Garden) about using leaves to build healthy soil.

Raking grass - a local resource.
But could it really be so simple? 
In the beginning (if you are starting with a new garden site), or even as you transition from using commercially available soil amendments, you may need to use a pre-mixed, organic fertilizer, or concentrated materials applied judiciously, in addition to leaves, grass clippings etc. For example, in the first years of the Alpine, and Monroe Sharing Gardens we used rabbit and llama manure (dried and sifted as part of our nursery/potting mix, or worked into the hole with transplants.) We used an all-purpose, organic fertilizer in this same way, along with some kelp powder (for minerals and micro-nutrients). At times we have also used fish, or seaweed liquid concentrates as a "foliar feeder" (diluted with water and sprayed on plants when they showed signs of mineral depletion or stress.) But our primary methods of maximizing the fertility of our soil have been through mulching deeply using locally available "waste products": Leaves, grass clippings and spoiled hay (wet or moldy hay that can no longer be used as feed or bedding for livestock).

Volunteers sharing in the harvest. Now that's local!
Taking local food production to a new level
One hot topic these days is "eating local".  A "locavore" is someone who endeavors to eat foods grown or produced within a certain radius (for example, 100 miles). There are many reasons a person might choose to eat more "locally" but one common reason is to live lighter on the planet by reducing the amount of fuel needed to transport food. While this is an important piece of the puzzle, it's also important to go a step further to look also at where the fertilizers and other soil amendments come from. Even if the food you eat travels less than 100 miles, if the soil was fertilized with products that came from half-way around the world, this radically increases the "carbon footprint."  Many of these soil amendments also involve aggressive mining, or extraction methods that are environmentally damaging and threaten the delicate balance of life. Many of the sources for these materials are in increasingly shorter supply, making the long-term use of them unsustainable. Also, for people who choose to eat a vegan, or vegetarian diet, their use in growing vegetables is undesirable (ex: feather-meal, bonemeal and other slaughter-house by-products).

Don't treat your soil like "dirt".
As an overall philosophy, we feel it is better to work with nature and cooperate with the processes of soil-building and fertility that have evolved over eons, than to assume the role of a soil magician, concocting potions and powders, mixes and methods that can be complicated, costly and often disruptive to the health of your soil. The good news is that most, if not all of these products can be supplemented, and eventually replaced by resources that are local, renewable and sustainable: leaves, lawn clippings, kelp concentrates (powder and liquid) and modest amounts of animal manure.

Finding local sources
If you don't live in an area that will deliver leaves, or you don't have a site big enough to warrant a full dump-truck load deposited, here are some other ideas:
  • Offer to rake your neighbors leaves in exchange for using them in your garden.
  • Approach your neighbors about bringing you their bags of leaves.
  • Organize a "leaf co-op" where a group of gardening friends rake and share the leaves they gather.
  • Organize your local scout troop, or 4-H, or youth group to spend a few Saturdays in a row raking leaves in the neighborhood. You can offer this service 'by donation' and collect funds for the youth group's other activities.
  • Put an add on 'Craig's List' requesting leaves.
  • Set up a site at the local dump or transfer station.
Collection station Chris set up at the local dump in Mt Shasta, CA (1980's).
This last solution is one that my husband Chris, implemented quite successfully at his previous farm. At that time, yard "waste" was a real issue as it took up valuable space at the land-fill and meant that they would have to close and find new places to dump the community's refuse. Also, in many rural areas, instead of paying dump-fees, many people gather their leaves and burn them which not only deprives the soil of these valuable nutrients but adds to air pollution as well. Chris made an arrangement with the dump's manager whereby he set up a chain-link enclosure as a collection-site for yard waste and had a separate area for nursery pots and flats. Whenever the enclosure was full, Chris would get a call from the manager, and go pick up the load.

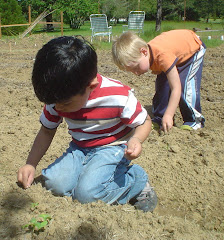
We're all just kids in the garden!
Whenever we write one of these "how-to" posts we try to add a couple of caveats: One is that, there are just about as many different ways to grow a garden as there are gardeners and this is just our way. Two: Gardening is a very dynamic process; each garden site is different, and each year the same garden site is different due to the weather and other shifting conditions. So, while these methods reflect what we're doing these days, check back in another year and see if we've evolved it further!

Please read our post about Herbicide Contamination of Compost, Manure and Mulch

Thursday, May 3, 2012

Leaving the Nest...Goodbye to Alpine

By Llyn Peabody

After much deliberation and soul-searching, we've decided to close down the Alpine Sharing Garden and focus exclusively on the Monroe site. Since having built the greenhouse (which requires us to water it at least once a day, and open and close vents based on daily and nightly temperatures) we realized it was just going to stretch us too thin to try and manage Alpine as well.

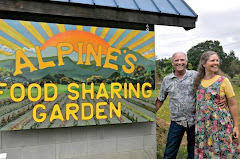
Sign painted by Chris Burns - 4' X 6'

There is a possibility that other people in Alpine may continue to garden there. The Garden Club (a group of about eight people who oversee the park) have agreed to let the fence and the raspberry patch remain. The garden will need major remedial work as much of the grass has already filled in where we had garden beds these last three years. (It's amazing to me how fast it has happened! No need to worry about the lawn coming back!) It's not clear how the garden will be organized and how people can get involved but you can let us know if you want to be put in touch with other interested gardeners and we'll connect you. If there isn't enough interest to keep the Alpine Garden going, the Sharing Gardens will come and remove the fence and use it at the Monroe site as the fencing was all either donated to us, or paid for out of donated funds. The raspberries will be distributed to those who are interested.

Alpine Garden - before the fence

We feel bittersweet at the passing of this milestone. Alpine is where the Sharing Gardens were born and it will always hold happy memories: I remember, before we'd even started the fence, potting up raspberry cuttings donated for use in the gardens and to share with the community. We had an amazing first season that went from ground-breaking on April 15 to our first harvest just three months later on July 13. To me, just new to gardening, it seemed miraculous to turn a lawn into food in such a short time. The Alpine garden was the site for the filming of the Peak Moment TV program (click here to view it) and several fun potlucks. As we frequently gardened without volunteers there, and it was smaller than Monroe, we often felt that Alpine was our sanctuary garden. It provided a place of peace and re-creation. We wish to thank once again, the Garden Club, the Alpine Community Center, all the granting agencies and the dozens of people who gave of their time, money and resources and who helped move the idea from a dream into reality. We couldn't have done it without you.

9.5 weeks after breaking ground

We are very excited about this coming season in Monroe; with  the greenhouse in place we are able to have a continuous supply of starts ready to pop in the ground as space opens up. We're expanding within the fence-line to utilize every available space. We hope to make a shaded area with a picnic table so people can enjoy each other's company while shelling beans, or processing sunflower heads, or whatever other sit-down tasks we can come up with. It's going to be a really nice place to stop by and visit. We hope you will!

14 weeks - 2009


A few specific wish-list items:
  • T-posts or old well-pipe - We need to put up a few more trellises to support tomato cages and beans. Six to eight feet tall would be ideal but we can make the shorter ones work. Slightly bent OK.
  • A T-post puller 
  • Strong wire - also for trellis building. Each row is approximately 70 feet long. 
  • Spoiled hay - we already received a ton and a half of straw from Mark Frystak and the Soggy Bottom Farms. That will probably carry us for another month but when we start to plant tomatoes and squash we'll be in need of another delivery of a couple more tons. Remember, we can give you a tax receipt if you need it.
  • Riding lawn mower with bagger.
Raspberry Bounty!

Friday, April 27, 2012

Lettuce: From Seed to Feed - Part 1: Planting

Red Iceberg Lettuce - a summer rose!
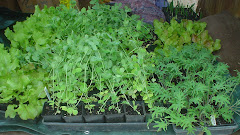
Here in the Pacific NW, we start our lettuce seed in a greenhouse in late February and then transplant the starts out in April or May when conditions allow. We're vegetarians and end up with a lot of those white, plastic, square tofu containers. We've found they make great tubs to start small seedlings. We drill holes in the bottom for drainage, fill with a good potting mix (using the bottom of another tofu tub to pack the soil firmly and make a flat surface for the seeds).

After misting the soil so it is good and damp, we sprinkle the lettuce seeds with our finger-tips trying to have a 100 or so seeds per tofu tub.  Lastly we gently sprinkle a thin lay of cover soil over the seeds and lightly mist to settle the seeds. They must be kept moist but not overly wet or the seeds and starts may rot. Lettuce seed germinates best in a cool soil so don't put it on a heat mat or under a lamp to get it to germinate.

Lettuce seedlings in a tofu container. Using a pen to make holes for transplants.
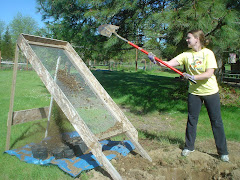
When the seedlings are about 1/2" - 1" (2 cm) high, they are ready for transplanting. We put ours in regular or "jumbo" six-packs. We use a basic, organic potting soil and add our own fertilizer. To each wheelbarrow of soil we add about two cups of all-purpose organic fertilizer and about a half-gallon of sifted rabbit manure . When germinating tiny seeds (such as lettuce), we sift the soil before adding amendments so the seedlings don't have to push past un-composted bits of bark or wood-chips in the soil. For transplanting, we don't bother to sift the soil.

Transplanting seedlings
For the Sharing Gardens, where we might grow 1,000 or more lettuce plants per season, transplanting is done in large batches. Being systematic in the nursery will save you time and materials and you will have much better results. Have labels ready so you keep track of the varieties you are transplanting. Fill a flat of six-packs and mist it with water and soak the seedlings too. Wet soil is less shocking to transplanted roots than dry. Cupping your hand over the whole tofu-tub of seedlings, flip it over and tap the bottom, catching the whole clump of soil and seedlings in your hand. Gently flip it back over and place it on a tray to catch the loose soil as it drops off.

Seedlings "hardening-off".
Using your finger. a stick or some other object, make a generous hole in each of the cells of the six-packs. Pull off a clump of seedlings and, holding them by their leaves, tease apart a single plant with its roots. On a cool, overcast day you can lay a large number of the seedlings alongside their holes before dropping them in and squeezing the soil around them. If the day is hot or the sun is strong, work in smaller batches so the seedlings don't get shocked. It is very important that all the roots go down into the soil and are covered. If they stick out from the surface, this is called 'J-rooting' and  will often kill the plants as they dry out too easily. This is why you want to dig a generously-sized hole so the rootlets don't catch on the sides as you lower them in. after pressing the soil in around each seedling, water them in gently to settle the soil. Label the tray and move onto the next.

Transplanting peas and lettuce
Depending on warmth and sunlight, and the size of the six-packs you use, your lettuce will be ready to plant in the soil in six to ten weeks. If you stagger your plantings it will mean your lettuce doesn't all come ripe at once. Ideally you wait until the root ball has filled the six-pack cell enough to hold the soil as you pop it out, without being totally root-bound (roots coming through the bottom of the six-pack). A week or two before you transplant into your garden, bring the starts outside and begin "hardening them off". Put them where they will get plenty of sun but not too much wind. They will withstand a light frost but if it is going to get very cold, or doesn't warm up in the day, bring them back into the greenhouse till conditions improve. During this hardening-off period, prepare garden beds so they are ready to receive transplants. In our "deep-mulch/minimal till" gardens, we pull a row of mulch over to the adjacent path (with a pitchfork) and, with a trowel dig a small hole just the size of the lettuce's root-ball. This leaves worm holes intact and lettuce seems to thrive without any roto-tilling needed.

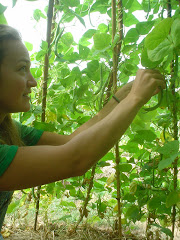
Several weeks after transplanting. Picking individual lettuce leaves for salad.
Here in our area, slugs can be a real problem in the spring. Follow this link for ideas on how to re-use milk cartons or soy-milk containers to thwart off their feasting. Re-Purposing Things We don't find that additional fertilizing is necessary for lettuce plants. They receive enough nutrients from the soil. We hold off on mulching them because we want the sun to warm up and dry out the soil and mulch provides habitat for the slugs. Sometimes, after the lettuce is well established and the soil is warmed up, we mulch with a few inches of grass clippings around our plants. Let the clippings dry out for a few days on a tarp or in a bin. Fresh clippings, if piled thickly, can heat up considerably and burn your plants.

Chris Burns with beautiful lettuce harvest! 2011
We plant our lettuce spaced about 6" - 8" (12 - 15 cm) apart. We harvest them intermittently giving the remaining lettuce room to grow. In the early stages, before the heads are fully formed, we harvest one to three leaves off each plant, rather than clipping whole heads. As the heads become full size we harvest by cutting them off at the root with a paring knife, leaving the roots in the ground to feed the worms.

Fall Crops: Give yourself 45 - 60 days (before hard freezing) to grow your fall crops of lettuce. You can assist your lettuce in germinating if you begin the process in a shaded area so the soil isn't too warm. Once seedlings come up, they will need sunlight to grow but do this outside of the greenhouse so they don't get too hot. Heat triggers the plants to "bolt" (go to seed) even when the plants are very young.

Favorite varieties: Everyone who eats out of our gardens seems to prefer green lettuce to red, or at least to have some green to mix in with the red. (This even includes the bugs who seem to devour the green lettuce much more voraciously!) Our recipients also seem to prefer head lettuce to the "leaf" lettuce. We don't know why this is (maybe just habit...) but we take this into consideration when we plant out our gardens. There are hundreds of varieties of lettuce to choose from. The most popular ones we grew this year were:

Buttercrunch
Chartwell's Romaine
Green and Red Iceberg (home-grown Iceberg lettuce is much more nutritious than store-bought).
Four Seasons (a red Romaine-type lettuce)

Next installment: How to Save Lettuce Seed

Friday, April 20, 2012

Seeds and 'Starts' Giveaway and Fund-raiser - Saturday, April 21

Come see the new greenhouse and take home starts for your garden!
Seeds and 'Starts' Giveaway and Fund-raiser for the Sharing Gardens. Saturday, April 21 - 9:00 to noon at the Monroe garden site. We've grown over 3,000 starts in our new greenhouse! Many of these will be planted in our own plots but we have purposely grown extra to share. We also have packaged up many of the seeds we've saved and these will be available too. All seeds and starts are free for anyone not going to sell their produce. Donations also gladly accepted. We will have lettuces, broccoli and kale. More to follow in a few weeks. Later in the Spring we will have flowers, tomatoes and other starts to share as well. If you have any empty nursery pots or flats you can bring them for us to re-use. 

The Monroe Sharing Garden is behind the Methodist Church - 648 Orchard St. Turn into the parking lot and head straight back. Look for the sign and shed below (you can't see the greenhouse from the parking lot).

Friday, April 13, 2012

Mason Bees - The Friendly Pollinators

Mason Bees appear like a big house fly with a greenish black shine to them.
Did you know that Mason Bees (Osmia lignaria) are one of the most common hole-nesting bees? They are wonderful pollinators, especially for apples and pears. Researchers claim they can be up to 90% more efficient at pollinating than honeybees due to the fact that Mason Bees will forage in light rain and at cooler temperatures than honeybees and other pollinators. If you are worried or concerned about getting stung then this hard working little Mason Bee may be just what you and your flowers and vegetable gardens are looking for. Mason Bees are not aggressive since they are a solitary bee and are not defending a queen they are considered quite docile. 
Linda's nesting boxes are hung under the eves, on the southeast side of a shed so they get sun and are protected from prevailing winds/rains. Insets show other styles of nesting boxes.
Nesting boxes for Mason Bees: In the photos you can see that I have quite a few nesting boxes. My nesting boxes are hanging under the eaves of my pump house facing towards the southeast so they can be warmed by the early morning sun and protected from direct rain.  Mason bees are easy to care for. You can make new nesting boxes by using a drill press and a 5/16 bit and blocks of UNTREATED wood. You may also purchase nesting straws. I have found the straws at the WildBirdsUnlimited store in Corvallis. For right now I have placed 2 new nesting boxes and a package of straws for the ladies to use as new homes for their eggs. As these begin to fill up I will continue making new boxes. Last year the girls were so prolific that I had to make several new nest blocks 3 different times.
Chris hangs nesting boxes at Crowson/Monroe garden
Mason Bee life cycle: This year, my Mason Bees began emerging in early April. The males hatch out first once our temperatures get above 55 degrees for 3 days in a row. The females seem to understand that it is important to lay female eggs at the back of the holes and lay the male egg at the front of each hole. This assures the survival of this species as it only takes one male to mate with several female Mason Bees. Once the weather begins to warm and the males emerge they then wait around for several days for the females to chew through their cocoon and then chew through the mud wall that divides each egg cell until they reach the end of the nesting hole and crawl out to live their short productive life in our wonderful Willamette Valley. The males then fly around chasing the females in a mating dance. Once the males have mated their job is complete and they die. The females immediately begin gathering pollen and laying eggs. They do not excavate holes but look around their environment for a 4-6 inch-long space that is approximately 5/16 of an inch in diameter. They are often seen crawling up under house shingles. No need to worry though. They do not damage your siding but are merely looking for a safe, dry place to lay their eggs. After she has gathered pollen she will return to the nesting tubes/boxes, fly into the holes and turn circles inside which helps the gathered pollen fall off her body as she wiggles her way to the end of the tube. 
Mason Bee larvae with pollen-ball for larval feeding.
There she will lay her tiny egg and put a pollen ball on top of that. She will leave about a 1 inch space and she then make a 1/4 inch mud plug to wall off that egg, hence the name "Mason" Bee. For the next 8-10 weeks these busy ladies continue gathering pollen and nectar. Sometime towards the end of June their life's work is over and they die. During the summer months the eggs develop into larvae. The larvae feeds on the pollen and nectar and develop into pupae. The Mason Bee pupae develop into bees protected inside a cocoon. They hibernate over the winter and emerge sometime towards the end of March or early April to start this marvelous life cycle over again. Click here for excellent pictures of Mason Bee life cycle.
HappBee gardening. Linda Zielinski
Linda Zielinski is an avid Mason Bee 'farmer' who lives in Philomath, Oregon. She generously provided the "Sharing Gardens" with a starter house of bees which we hope will multiply so we can spread them around the valley and help other gardeners get them established. Check back next February if you're interested in getting a starter house of Mason Bees for next spring. Thank you, Linda, for writing this article about the bees for us to post on our site.

Thursday, March 15, 2012

On your mark...Get set...Grow!


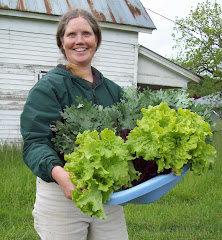
Lettuce and kale at harvest time
We have exciting news! Chris and I are just days away from finishing our new greenhouse at the Monroe site. It's a moderate size, 12' x 40' but plenty big to grow enough starts for the garden and to share with others in need. It's our own design, made with bamboo held together by PVC fittings and a plywood skirting around the bottom. We've screwed it all together so, if we ever need to move it, it will come apart easily.

We'd love to show you a picture of it but that brings us to another topic...Our camera no longer "talks" to our computer. It still takes pictures and stores them on its memory chip but we can no longer upload them. Help! Does anyone have a digital camera they're no longer using, that they'd like to donate to the project?

Other news:
Saturday, March 31 - 9:00 to 2:00 is the springtime Giveaway at the Legion Hall in Monroe, organized by Christy Warden and her "Crafty Critters" 4-H group. This bi-annual event gives us all a chance to clean out our closets and pantries and make way for the new. You may make donations on Friday, March 30th between 10 and 2 at the Legion Hall in Monroe. Please bring: clothes, housewares, non-perishable foods and whatever else you are ready to let go of. The Sharing Gardens will have broccoli, cabbage, peas and sunflower starts to give away. The event is open to everyone, regardless of your income level. Leftovers will go to other charity groups (decided by the 4-H members).
4-H Giveaway - 2011
Wednesday, April 25 - 5:00 to 8:00 pm, Sharing Gardens is participating in the Health Fair at the Monroe High School. There are many other groups participating, offering free blood-pressure and other health checks and information on living a healthier lifestyle. We'll be demonstrating a simple and delicious way to grow your own winter-greens: sunflower sprouts.

Farm to Farm Century Ride: Last September, this 100-mile cycle event -- touring local farms -- was such a fun and successful way to raise money for the gardens (the organizers donated $2,000 to our project) that we're going to do it all over again. Save the date: Sept. 15, 2012. There will be a fifty-mile version, and a 100-mile version. We'll be looking for volunteers to join in the fun.

Volunteers at harvest time
Volunteering: We're starting to get inquiries from people who want to help out in the gardens. Here's how this works. During the spring months, we have to work with the challenges of the weather and the wetness of the land. It's difficult to establish consistent volunteer times. By June, things will start to fall into a rhythm and we will have regular times we'll be gathering in the garden to plant, weed, mulch and harvest. If you'd like to be informed of times you can help out in the greenhouse, or gardens; learn about growing food organically, and share in the harvest (and you're not already on our list) just send us an email to shareinjoy@gmail.com.

Gratitude: We have a big thank you to extend to Larry Winiarski. Not only did he hire us to help him set up his greenhouse for maximal functionality but he let us start a bunch of seeds while we speedily finished up our own new greenhouse in Monroe. If it weren't for Larry we wouldn't have been able to get broccoli, kale, cabbage, lettuce or spinach started in time.  John Kinsey has also been a huge help. He's started peas and onions in his own greenhouse, donated a considerable amount of salvaged lumber for use in building the greenhouse, and also helped us spread donated leaves in the gardens for mulch. We'll be doing a whole post on John at some point. He's developed quite an amazing set-up for growing red-wiggler (composting) worms and he's provided the gardens with dozens of bags of their pure castings for us to amend our soil and grow starts in. John Sundquist generously opened up his River's Bend Farm and let us harvest all the bamboo we needed to build the greenhouse (and more!). We also wish to thank the others in the community who have hired us to do pruning and other yard-work jobs. The income from this work is what is allowing us to keep doing the gardens as we are financing the project primarily out of our own savings at this point. Thank you all.

Barbara Standley donating nursery flats
Wish List:
  • A digital camera: preferably 8.3 mega-pixels (or better) as lower-resolution pictures don't work as well for our blogs.
  • Save those six-packs! If you buy starts commercially, save the six-packs and other pots they come in. We can use all sizes. We prefer square containers that fit into trays but bring us what you've got and we'll find homes for what we can't use.
  • Utility trailers: We've been talking to the landscaper at the grade school and, if we have a trailer that he can dump the grass clippings onto, it will be an easy matter to haul them to the gardens and use for mulch, or in our compost piles. We haven't talked to the high school landscapers but we suspect they'd be willing to work with us too.
  • Plastic tubs, 5-gallon buckets, kitty-litter tubs etc. (please no broken ones)
  • T-posts (slightly bent, OK). All lengths helpful.
  • Metal pipes: (like from a well) - we can cut them to size and build trellises from them.
  • Cedar fence boards - we use them to build bird houses and compost bins (among other things).
  • Cash donations always appreciated.
For our full wish list click here.

Monday, March 5, 2012

Designing for Generosity

 We came across this video recently and are excited to share it. In this Tedx Talk, Nipun Mehta speaks simply and eloquently about the inherent goodness in people and the joyous feelings of satisfaction that come through giving generously without thought of receiving. Chris and I, through the Sharing Gardens, are offering the opportunity for this same kind of experience to our neighbors in Alpine and Monroe (and others, vicariously, around the world!)  it just plain feels good to give! When you watch this video, it is not so difficult to imagine a world transformed through simple acts of kindness. Pass it on! Love, Llyn

What would the world look like if we designed for generosity? Instead of assuming that people want to simply maximize self-interest, what if our institutions and organizations catered to our deeper motivations? This compelling TEDx talk explores this question and introduces the concept of Giftivism: the practice of radically generous acts that change the world. The video is charged with stories of such acts, ranging from: the largest peaceful transfer of land in human history, to a pay-it-forward restaurant, to a 10-year-old's unconventional birthday celebration, and the stunning interaction between a victim and his teenage mugger. With clarity and insight, it details the common threads that runs through all these gift manifestations, and invites us to participate through everyday acts of kindness -- in an uplifting global movement.


Thanks so much for the folks at KarmaTube and Nipun Mehta (the speaker in this video) for cultivating generosity and kindness in the world.

Thursday, January 26, 2012

Broadening Our Horizons


Many people have expressed curiosity about Chris' and my living situation. How do we afford to have the time to dedicate the many hours a week we devote to the "Sharing Gardens"? Why do we so rarely invite anyone over to visit us in our home? Are we independently wealthy or just very frugal?

About three years ago, at the same time we were getting the Alpine "Sharing Gardens" started, Chris and I decided to seriously downsize. We were spending about $800/month on rent and utilities (not to mention all the other costs of running a household). Our house was way too big for our needs and we felt disheartened at seeing all that rent money being spent for nothing tangible that could grow in any meaningful way. We put up some posters around town advertising for a new place to live. The first people to respond had the perfect situation: An 8' x 40' travel trailer - hooked up to plumbing, sewer, and electricity, in a little grove of trees overlooking 400 acres of farmland. It was a place we could rent for a small fee and several hours a month of work-trade. Free from the stress of meeting such a big monthly financial obligation we could slow down our pace of living and devote our energies to the "Sharing Gardens" and other service projects.

We live a simple life. We rise early and spend time with our spiritual studies; acknowledging all we have to be grateful for, getting quiet inside so we can listen for guidance, then we do some yoga on the floor. Most mornings we choose a simple project, preferring to get one or two things accomplished without haste or pressure, rather than facing a huge list of tasks that can never all get done in the time allotted. On any given day, we may not get much done but, like the Tortoise, we find that - "Slow and steady wins the race." Reflecting back I can see just how much we have accomplished unaccompanied by the sense of hurry and pressure that so many people experience, engaged in the usual busy, modern lifestyle. Afternoons usually include a nap, or at least a rest-time; a pause before taking on an afternoon project, going for a walk, computer-time or other household maintenance tasks.

Tomato sauce - 2009
We are ovo-lacto vegetarians, eating plant-foods, eggs and dairy products. This is not a religion for us but we notice we feel better eating this way and know it helps us live lighter on the planet (and easier on the pocket-book!) Through the "Sharing Gardens" we are able to grow a high percentage of our food. Mid-August through Thanksgiving are the busiest times for us as we convert the harvest into stored goods that will see us through to next year's garden-season. In Autumn we also fill our pantry with gleaned fruits and nuts and wild mushrooms foraged in the woods near our home. We keep our two food-dehydrators going almost non-stop during this time and 'can' a variety of foods and juices.

Loft-bed with root cellar below.
Living in such a small space can be a challenge at times, especially in the wet, cold, winter months when we spend more time inside. A few months back, we removed our dining room table and chairs and began eating "Japanese-style", sitting on the floor to make room for morning Yoga. We have a plastic table-cloth we pull out to sort seeds, do craft projects or other things we used to do on the table. The side-benefit of this arrangement is that all the "ups" and "downs", several times a day, for meals etc has also increased our fitness and flexibility. But it has also limited who we can have over for extended visits, as not everyone is up for these forced calisthenics!

We appreciate as well, the blessings of this lifestyle. It has prevented us from accumulating excess possessions (as a friend put it, who also lives in a travel trailer, "You empty your pockets and its time to clean house!"). It has encouraged us to be more organized as well. For example, we have many of our shoes hanging from a peg-board, we hang plastic bags we've washed for re-use from cup hooks using clothes-pins and our bed is built up on a loft which provides a "root cellar" and cool storage space below! Such a small space encourages us to get outside often for walks and find projects that can be done in the shop-space we have in the barn.

We can dream, can't we?
However, as much as we love our little home, lately we have begun to feel urges to move to a new situation. We would like a place with 3-4 bedrooms so we would have room to invite guests to stay; host some interns to learn about the "Sharing Gardens"  - to transplant this model to other towns and cities. Ideally our expenses wouldn't rise too steeply. A fixer-upper farmhouse, or care-taking situation where we could do work-trade for part of our rent could be a real win-win. We'd like a place we could really grow into--developing a garden site on the property, managing a greenhouse; having a shop-space for projects and a big enough living room to host song-circles, other community-building gatherings and classes in rural-arts skills as we've outlined in our Mission Statement.

These times we're living in are calling for people to return to having many basic skills our grandparents took for granted: growing and storing food, repairing things instead of just getting new ones, making and mending clothes and taking care of each other in a spirit of family, "neighborhood" and community. We would like to create a welcoming home/school where people could teach and learn these kinds of skills and develop friendships based on the meaningful exchange of information and service. Do you happen to know of such a place? We'd like to hear from you.

Planting trees.
In an effort to increase our cash-flow and prepare the ground for this next step in the "Sharing Gardens" ministry, Chris and I would like to offer our services to the people in Alpine, Monroe, Junction City and Harrisburg on a sliding scale basis. Both of us bring skills and experience in a variety of trades, from gardening and landscape maintenance, to painting and handyman work. We can also do cleaning, hauling and organizing. Your support in hiring us will go directly towards keeping the "Sharing Gardens", and all they stand for, thriving and blossoming in South Benton County and beyond!

We can be reached by phone or email:

Llyn and Chris - (541) 847-8797
Click here to send an email