Our new and improved site

(with the same content as this one, AND MORE!) is

www.The SharingGardens.blogspot.com/

Friday, January 28, 2011

Give Peas a Chance

Here in the Pacific NW, and in many other parts of the world, varieties of an insect called the Pea Weevil (Sitona lineatus) can destroy the peas and other legumes you are saving as seed crop. As the peas mature in the pod, the weevil lays an egg in each pea. If you store these pea-seeds as-is, by spring time each one will have a tiny hole bored by the larvae, from the inside out, destroying the seeds' ability to sprout and grow. A year ago, we had a whole stash of our pea seeds destroyed from these weevils and we didn't want it to happen again.
Signs of pea weevils
An on-line search revealed no low-tech solutions for seed-savers. We read about research to create genetically modified seeds (GMO's) and super-cold flash-freezing done with dried ice. The dry-ice idea got Chris to thinking so we decided to experiment. We took our whole stash of pea seed (about six cups) and put it in an air-tight zip-lock bag, in a regular freezer, way in the back corner, and left it there from August to January (four and a half months). The seeds were fully ripe and dry when we put them in the freezer. (There was evidence that the weevils had already laid their eggs as virtually every seed had a small, brown spot--a sign of their entry point.)
Pea weevil cycle

In early January, we conducted a germination test. We wrapped about 50 seeds in a wet paper towel and kept them moist in a dish for five days. At that time, we counted how many had begun to sprout (about 40) which means they have a germination rate of at least 80%. This is excellent! Then, to be sure that there weren't any pea weevel larvae still dormant in our seed stock, we put about 30 in a tightly sealed plastic bag and left them out at room temperature for two weeks to see if any would hatch. None did. Though it appears we have killed the larvae, we're not taking any chances and we're leaving the pea seeds in our freezer till it's time to start plants this spring.

To save pea seeds, grow them to maturity and leave the pods attached to the pea vines until they are starting to turn tan and shrivel. Strip the pods from the vines and place them in a warm, dry place to finish drying (we lay them out on nursery trays on the top shelf of our garden shed for about a week.) Pop the peas out of their pods, place in freezer-bags (properly labeled with variety of seed and date) in the freezer, way in the back (or bottom)--the coldest spot. Leave them there until you're ready to plant next year's cycle.

If you have comments or anything to add to this post, please do so directly below so everyone benefits from your experience.

Friday, January 14, 2011

"Sharing Gardens" Update and Wish List

In this post you'll read an update on the "Sharing Gardens" - including construction of our 20' x 100' greenhouse, our vegetable plant give-away, our youth-garden program starting in the spring and see what's on our current wish-list.

So far, we've been blessed with a relatively mild winter here in Alpine/Monroe, and we've been able to move forward steadily on greenhouse construction.

We'll be writing a full handbook on all the details of the hoop-house construction which will be available as a PDF, so we won't go into details here on the blog about how its done. The short version (according to Chris, who's built many of these hoop-style greenhouses) is that the greenhouse is about half-way done. We figure we're still on track to complete the project sometime in February.

This will give us plenty of time to get seeds started for this year. We're going to be growing a great abundance of starts this year. "Enough and to spare...to give and to share." These will be available to everyone for free. We'll let you know when they are available for you to bring home to your own gardens.

We have a short wish-list of materials we need for the greenhouse and garden project. If you can help us out with any of these things, please send us an email, or give us a call.

nursery flats and containers
6" stove pipe, 2 adjustable elbows and a cap
treated 4 x 4's  - 6 feet or better
dry, spoiled hay ( we can arrange to pick it up or give you some gas money)
bagged leaves to either garden site
cedar or redwood fence or deck boards
cash donations
(make checks to Alpine Community Center - "Sharing Gardens" and mail to PO Box 11, Monroe, OR 97456)

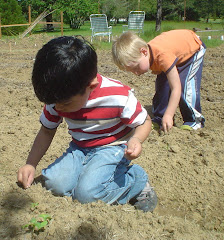
Bruce, Rann and Doreen preparing beds. Note heavily mulched paths.
Other garden news: This spring we'll have three volunteer times. Wednesdays will still be at the Alpine Garden. Thursdays will be at the Monroe garden (times to be determined on a week to week basis). We're going to add a third garden time on Monday afternoons right after school. These will take place either at the Monroe garden or at our new greenhouse. Though young people ages 9-18 will be welcome at all three weekly sessions, due to school hours they probably won't be able to participate on Wednesdays or Thursdays till summer so the Monday sessions will be focused on including them in the garden project. We need some committed adults who would like to join us for the Monday sessions and mentor the young people in gardening skills. We're also wanting to connect with young people who have a sincere interest in learning to grow food and who wish to be of service to their community.

Chris with a 4-H class he led in California.


Gratitude goes to:
  • the anonymous leaf donors at both garden sites - keep 'em coming!
  • Renee Duncan - we're finally using the cedar boards you donated last summer. There will be many happy bird families with new nesting boxes in the spring, thanks to you.

More about Potatoes


(To read a compilation of all our potato blogs, go to:
Can I plant potatoes from the grocery store? and

 
This potato has already begun to turn green from exposure to the sun. Don't eat it, plant it!
We had two questions come in about our last potato-planting blog. Here are answers. Also, to read the three other posts we've written about potatoes, follow the links below. You can also do a search on our site (scroll down the right-hand column, about six inches to find the search window). 
Question #1: When is it time to plant potatoes?

Here in the S. Willamette Valley, you can plant them mid-March to mid-June. Depending on the variety you plant, they take 13 to 17 weeks to ripen. You may wish to plant them in succession so you'll have some potatoes to eat fresh and, the later harvests will last longer through the winter. It is likely you'll be able to buy seed potatoes for several months to come but they get more expensive, the longer you wait.

Storage: If you buy them in a plastic bag, transfer them into a cardboard box or paper sack so they don't rot before you get to them.

Question #2: If I buy some organic spuds now, will they grow eyes in time for planting? Do they have to have little eye sprouts? 

Just to clarify: all potatoes already have "eyes". These are the little indentations scattered around the skin of the potato. This is where the "sprouts" emerge from. You do not need to buy potatoes that are already sprouting. They will naturally begin to sprout in a few month's time.

Sprouting potatoes? What to do.

More on "chitting" Potatoes

Planting Potatoes

Potato leaves, when the first emerge.

Wednesday, January 12, 2011

Get Your Seed Potatoes Now

 (To read a compilation of all our potato blogs, go to:
Can I plant potatoes from the grocery store? and

Potatoes are easy to grow and an efficient use of garden space. One seed potato can yield as much as five pounds of potatoes. Seed-supply companies would love for you to buy from them but you can save money by buying your potatoes from the produce section of your grocery store. The term "seed-potato" can be misleading. Potatoes do, on occasion produce seeds, but growers do not grow their crops from them. Instead, they grow them from small sprouting potatoes. (See our other articles about "chitting"--greening, and planting potatoes).

These green spheres in Chris' hand contain actual potato seeds but rarely do people grow potatoes from seeds.
It is important that you buy organic potatoes because many of the commercially grown ones are sprayed with a "sprout-retardant" which gives them a longer shelf-life. It is important to buy them within the next month as, the longer you wait, the higher the prices will go.

How many to get? Each plant will take up about 12 - 16 inches of row space. If stored well, they will last for up to six months before starting to sprout again. Figure on 3-5 pounds of yield per potato you plant.

What size should you get? Ideally you will find them that are about the size of a chicken's egg. Larger potatoes can be cut and allowed to skin over so they won't rot when you plant them. If you can find potatoes that already have "eyes" that are budding, so much the better.

These are all a good size for "seed potatoes"
What varieties are best? Some of this will be determined by your own personal tastes. In terms of storage, Chris says he has always had the best luck with Yukon Golds. They have a smooth, creamy taste and can be baked, steamed or fried.

Keep your seed-potatoes in a cool, dry, dark place until a few weeks before you wish to plant them. They will store better in a paper sack than in plastic. Layering them in a tub with leaves or straw, or sawdust works too. Just be sure to keep them from freezing.

Potatoes stored in layers of leaves.