Our new and improved site

(with the same content as this one, AND MORE!) is

www.The SharingGardens.blogspot.com/

Showing posts with label lawns-to-gardens. Show all posts

Friday, May 4, 2012

Grass Clippings and Leaves for Fertilizer/Mulch


photo: Muhammad Sajjad
Turning over a new leaf
Leaves, grass clippings and other yard "waste" make excellent fertilizer for garden soil. We have been demonstrating this at the Sharing Gardens with vegetable yields in the tons (2012 Harvest Totals). My husband Chris also demonstrated a great increase in fertility using yard "waste" on his 5-acre farm in the high-desert country NE of Mt. Shasta, California (back in the 1980's - '90's). Within a short amount of time, using only leaves and grass clippings, alfalfa-powder that he collected from the floor of a pellet mill nearby, and a modest amount of goat and chicken manure from his own livestock, Chris turned volcanic soil, the consistency of beach-sand, into a garden that inspired Organic Gardening Magazine to write an article about him called "Defying the Odds on a High-Desert Oasis" (March 1991). Chris' gardens were so bounteous and beautiful that his farm was nicknamed "Findhorn West!"

Feed your worms and other "micro-livestock" directly in the soil!
We have already written several posts that go into great detail about the simple methods we use at the Sharing Gardens, using local materials, to increase fertility (links below). In essence, our method is to feed the soil with leaves, lawn-clippings, spoiled hay and vegetable scraps, weeds and the plants we pull at the end of the season to feed the "micro-livestock" (worms, bacteria and other "composters"). As these garden-partners eat their way through the yard and garden "waste" we provide for them, they fertilize the soil with their manure and create minute tunnels that keep the ground from compacting.

Organic Matter, the "The First Amendment"
As our dear friend, James Cassidy (professor of Soil Science at Oregon State University) likes to say about soil health, no matter what challenges you are facing, the answer is always "add organic matter!"

Here is a step-by-step guide to one of the methods we use at the Sharing Gardens to increase the fertility and tilth of the soil using a lot of grass clippings combined with dry leaves.

Two to three weeks before planting in a bed, spread a layer of leaves and grass clippings and till them in.

1. Thinly distribute dry leaves over the surface of your grass. You want there to be more grass clippings than leaves in your final mix. It'll be much easier to do with dry leaves saved from the previous Fall.
Maple and fruit trees have thinnest leaves that break down quickest. Avoid walnut leaves as they will make your soil toxic to your seedlings. Oak and other thicker leaves work fine -- just mix in more grass clippings than with thinner leaves.

2. Run the mower over the leaves/lawn, using a catcher-bag to collect them. Set mower at a higher setting. Sometimes you may have to lift and lower mower to avoid stalling.
3. Distribute them about 1" - 2" thick in garden beds. You can till first, or lay the grass/leaves out and then till them in.

4. Till grass/leaf combo into the soil passing over the bed two to four times to work them in well.
5. Worms and soil organisms will decompose them enough in 2-3 weeks for you to begin transplanting.
6. Stand back and watch your vegetables grow!
You don't have to spend lots of money on soil amendments, to yield beautiful results!
Note: if you use plain, fresh grass clippings (no leaves), they can be quite hot, if laid on thick. If used as a mulch around plants, be sure they don't actually touch the stems or leaves of the plants.
John mulches lettuce and broccoli using fresh grass-clippings.
Other related posts from the Sharing Gardens:
Preparing Garden Beds - One Low-Tech Way

Hay-Bale Compost

More on Mulch

Mulch We Love, and Why 

Benefits of Deep Mulching

CLICK HERE for article (from your Organic Garden) about using leaves to build healthy soil.

Raking grass - a local resource.
But could it really be so simple? 
In the beginning (if you are starting with a new garden site), or even as you transition from using commercially available soil amendments, you may need to use a pre-mixed, organic fertilizer, or concentrated materials applied judiciously, in addition to leaves, grass clippings etc. For example, in the first years of the Alpine, and Monroe Sharing Gardens we used rabbit and llama manure (dried and sifted as part of our nursery/potting mix, or worked into the hole with transplants.) We used an all-purpose, organic fertilizer in this same way, along with some kelp powder (for minerals and micro-nutrients). At times we have also used fish, or seaweed liquid concentrates as a "foliar feeder" (diluted with water and sprayed on plants when they showed signs of mineral depletion or stress.) But our primary methods of maximizing the fertility of our soil have been through mulching deeply using locally available "waste products": Leaves, grass clippings and spoiled hay (wet or moldy hay that can no longer be used as feed or bedding for livestock).

Volunteers sharing in the harvest. Now that's local!
Taking local food production to a new level
One hot topic these days is "eating local".  A "locavore" is someone who endeavors to eat foods grown or produced within a certain radius (for example, 100 miles). There are many reasons a person might choose to eat more "locally" but one common reason is to live lighter on the planet by reducing the amount of fuel needed to transport food. While this is an important piece of the puzzle, it's also important to go a step further to look also at where the fertilizers and other soil amendments come from. Even if the food you eat travels less than 100 miles, if the soil was fertilized with products that came from half-way around the world, this radically increases the "carbon footprint."  Many of these soil amendments also involve aggressive mining, or extraction methods that are environmentally damaging and threaten the delicate balance of life. Many of the sources for these materials are in increasingly shorter supply, making the long-term use of them unsustainable. Also, for people who choose to eat a vegan, or vegetarian diet, their use in growing vegetables is undesirable (ex: feather-meal, bonemeal and other slaughter-house by-products).

Don't treat your soil like "dirt".
As an overall philosophy, we feel it is better to work with nature and cooperate with the processes of soil-building and fertility that have evolved over eons, than to assume the role of a soil magician, concocting potions and powders, mixes and methods that can be complicated, costly and often disruptive to the health of your soil. The good news is that most, if not all of these products can be supplemented, and eventually replaced by resources that are local, renewable and sustainable: leaves, lawn clippings, kelp concentrates (powder and liquid) and modest amounts of animal manure.

Finding local sources
If you don't live in an area that will deliver leaves, or you don't have a site big enough to warrant a full dump-truck load deposited, here are some other ideas:
  • Offer to rake your neighbors leaves in exchange for using them in your garden.
  • Approach your neighbors about bringing you their bags of leaves.
  • Organize a "leaf co-op" where a group of gardening friends rake and share the leaves they gather.
  • Organize your local scout troop, or 4-H, or youth group to spend a few Saturdays in a row raking leaves in the neighborhood. You can offer this service 'by donation' and collect funds for the youth group's other activities.
  • Put an add on 'Craig's List' requesting leaves.
  • Set up a site at the local dump or transfer station.
Collection station Chris set up at the local dump in Mt Shasta, CA (1980's).
This last solution is one that my husband Chris, implemented quite successfully at his previous farm. At that time, yard "waste" was a real issue as it took up valuable space at the land-fill and meant that they would have to close and find new places to dump the community's refuse. Also, in many rural areas, instead of paying dump-fees, many people gather their leaves and burn them which not only deprives the soil of these valuable nutrients but adds to air pollution as well. Chris made an arrangement with the dump's manager whereby he set up a chain-link enclosure as a collection-site for yard waste and had a separate area for nursery pots and flats. Whenever the enclosure was full, Chris would get a call from the manager, and go pick up the load.

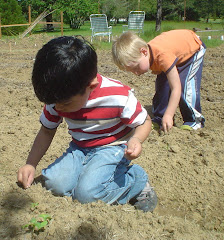
We're all just kids in the garden!
Whenever we write one of these "how-to" posts we try to add a couple of caveats: One is that, there are just about as many different ways to grow a garden as there are gardeners and this is just our way. Two: Gardening is a very dynamic process; each garden site is different, and each year the same garden site is different due to the weather and other shifting conditions. So, while these methods reflect what we're doing these days, check back in another year and see if we've evolved it further!

Please read our post about Herbicide Contamination of Compost, Manure and Mulch

Tuesday, August 24, 2010

The benefits of deep mulching

Deep mulching produces a bounteous harvest!
Here in the Sharing Gardens we practice a style of gardening known as "deep mulching". Just as it is rare to find bare soil in nature, in our gardens you won't find much exposed soil either. We use the materials that are easily available in our area (grass clippings, leaves and spoiled hay) and let nature do the work of increasing the garden's fertility. People who raise livestock such as cows, goats, chickens and rabbits know how important it is to give appropriate food, water and shelter to keep their animals healthy. In turn, these animals produce by-products that are beneficial to the people who care for them, not the least of which are the nutrient-rich manures used as the basis for many commercial fertilizers. In the Sharing Gardens, we tend to "livestock" on a slightly smaller scale. Worms, fungi, beneficial insects and bacteria are the micro-livestock we care for with our heavy mulching. They, in turn, provide a natural balancing of the soil along with castings and other "waste products" that feed the plants' rootlets right where they need it most.

Mulching feeds your "micro-livestock"

In these first years of establishing new garden sites in Alpine and Monroe, we also use a high-quality organic fertilizer, our own worm-castings compost, and rabbit and llama-doo applied judiciously to the plants that need a boost. But we don't apply any single concentrates of nutrients such as lime or gypsum as we have found through years of gardening experience that a garden's soil can get seriously out of balance through the application of these concentrates.

What materials make good mulch?  It is best to choose materials that are readily available in your local area. Urban gardeners may find that leaves and grass clippings are easiest to come by. Many cities will actually dump a load of leaves for personal use if you have an adequate drop-site. Do be aware that you can't be 100% sure of the kind of leaves you're getting. There is also likely to be some residue from oil and other materials from motorized vehicles (though probably not enough to be very concerned about). You'll need to be sure and use good gloves in distributing city-leaf piles as its possible that broken bottles or other sharp trash could be mixed in. Hand-raking leaves is our favorite method for gathering this valuable resource. Leaf-raking gives you a great work-out without being too strenuous (we call it "rakey" therapy -ha.) You can use tarps to haul the leaves to your garden, or bag them in leaf-bags. Sometimes we have stored leaves in rings we crafted from fencing, or just made a deep pile and tarped it for the winter. This latter option produced very rich, yummy, decomposed leaf compost by the following spring. The thinner the leaf, the easier it breaks down. Maple is our favorite. Oak takes a long time to break down and we wouldn't recommend using it unless you mix it with other types of leaves. Fruit-tree leaves are also great. Don't ever use walnut leaves as they have natural substances in them that are poisonous to plants and will destroy your garden's fertility.
Maple leaves make excellent mulch

If you live in, or near the country, spoiled hay makes a great mulch. Many farmers have hay from previous seasons that has become wet or moldy or otherwise unsuitable to feed to their livestock They will usually be glad to have you haul it away for free, or very little per bale. If you don't have a trailer, you might be able to arrange for the farmer to bring it to you if you give him something for his gas and time.

Another rural source for excellent mulch is to clean out the stalls of goats, sheep, cows or horses. It's ideal if their bedding material is straw. If wood chips or saw dust is their bedding, you'll only want to use it if its been composting for a year or more. The heavy balance of carbon in the wood-products can actually leech nitrogen from your soil..

A delivery of spoiled hay

When to mulch? In the cycle of a year's gardening, there are two main times for a mulch "push". At the end of harvest, when you're putting your garden to bed, if you have a large enough quantity of grass clippings, raked leaves or animal bedding from cows, goats, sheep or horses that has manure mixed in, you can apply this liberally and roto-till it into the ground. This gives you the whole winter for the micro-livestock to digest it in time for spring planting. It is not a good idea to till your mulch into the ground in the spring time because the "browns", the more woody/cellulose aspects of the mulch that are high in carbon will bind with the nitrogen in your soil and effectively rob it from your spring seedlings if tilled in too close to their planting.

The second cycle of mulching begins in the spring and continues throughout the summer as you plant your garden rows. In our gardens, we have used a roto-tiller to loosen the beds and then mounded them into raised beds by hand or with a tractor. In future years, as the soil improves through the addition of organic matter (hay, leaves etc), and the worm colonies have become well established, we may be able to maintain these beds just using a broadfork (a human-powered tilling tool that is less disturbing to the soil).

Why mound the soil? We take the time each year, to mound the soil into raised beds for several reasons. As you can see from the photo, in the wetness of the Pacific NW spring, it keeps the roots from drowning by raising them above the water table. Also, if your rows run east to west, the whole south side of them faces the sun which can significantly warm the soil temps; another great advantage to most seedlings' early growth. The mounded soil doesn't ever get walked on so, over several years, if you maintain your rows in the same spaces, this soil becomes very light and fluffy, with good "tilth".
Advantages of raised beds...
If you're using all that hay and grass clippings, what about weeds? This is a question we get asked a lot. Bringing a whole bunch of hay into your garden may not seem like a good idea as you also bring a bunch of weed seeds that can then germinate in your garden soil. They key is in applying enough mulch, soon enough. In our Alpine plot (80' x 100'), in the first year, our friend was able to till the ground a good 8" deep thus killing all the grasses/weeds already growing at the site. We mulched heavy and early and, in the whole season we probably weeded about a five-gallon bucket's worth of weeds out of the whole garden. No kidding. For contrast, in the Monroe site, because of a very wet, cold spring and the urgency of moving ahead and simply getting some things planted before the soil had had time to drain sufficiently for deep tilling, the ground was only tilled about 4" deep. Many of the weeds and grasses were only "scalped" and came back strong in the garden beds, so we have pulled many wheelbarrows full of weeds out of that garden. But the weeds are only coming up in the garden beds themselves. In the pathways that are heavily mulched, the weeds exhaust themselves before they can grow up to the light. As they die, they become mulch too and their rootlets provide yummy snacks for the worms to follow along as they work the soil.

How much is enough? You want to put enough of the material to keep in the moisture and block the sun from reaching any weeds growing in the paths. Hay bales often naturally break into "flakes". Just lay these in your paths, end to end, without fluffing them (which can scatter seed into your beds) and make it easier for weeds to grow through (5" to 8" is ideal). If you're using dried leaves, they too should be about 6" thick. Grass clippings work best if you put them locally around the base of plants (leave about a 2" gap around the  stem of the plant). When applied liberally in the paths they can form a gooey surface that can be quite slick and dangerous to walk on. They also become "felted" or matted down making it harder for water to seep through to the plant's roots. You'll be amazed to see, over the course of a year, that the 8" of mulch you applied in May, June or July, will be almost totally digested (from below) by the following March/April when you begin the spring plantings. Worms travel up to the surface of the soil at night and feed on the mulch, carrying it back down into the soil in their gullets and distributing it as castings throughout your garden.

Alpine Garden - 10 weeks after breaking ground 2009

 A summary of the benefits:
  • Keeps moisture in (less watering). Though when you water, you must water long and deep to be sure the water penetrates down through the mulch and into the soil. In our Monroe garden, we have gone over two weeks without watering in the heat of August but we watered each section of the garden for over two hours at the beginning of those two weeks. When you're first planting a bed - with seeds or transplants, you need to water more often till the plants are established. To check if you need to water, lift mulch in the paths and check for moisture level in the soil. You can often see red worms and tiny rootlets extending from the plants growing in the beds.
  • Keeps weeds down.
  • Balances your soil-nutrients (your "micro-livestock" keep things balanced without you having to figure it all out.)
  • Moderates day/night temperature fluctuations in the soil.
  • Adds organic matter to keep soil from becoming too sandy or clay-bound.
  • It's very comfortable to sit or kneel on as you cultivate and harvest your plants. (We had a photographer come to our gardens once and said it was "the most comfortable" garden she'd ever been in!)
 Sources for mulch:
  • Municipal leaf-gathering
  • Raking your own (offer to rake your neighbors' in exchange for keeping the leaves.)
  • Farmer's moldy or spoiled hay
  • Set up your own collection site: Rural transfer stations appreciate any solution that keeps material out of the landfill. Below is a picture of a collection site Chris established near his farm in northern California. 
A gathering site for mulch donations at the local, rural transfer station.
Here are some other pictures of our gardens showing the deep mulch technique:

Another example of how the garden looks--fully mulched--with hay.
Tilling in leaves in the fall - so they have time to decompose by spring.
The potatoes were mulched first with leaves and we're adding oat-straw in the picture.
This was a "lawns-to-gardens" project where we simply scalped the grass from the beds and mulched the lawn path-ways. The plastic on left was placed to "solarize" the grass (kill it in preparation for fall-crop planting).
Here Chris is using lettuce that has "bolted" (gone to seed) as mulch in the potato patch. Oat straw was then placed over it.
Fun in a leaf ring! (Robin, Chris' son in a "nest" of leaves1996)
Please read our post about Herbicide Contamination of Compost, Manure and Mulch

Sunday, May 24, 2009

Mulch-es Gracias


Alpine Community Garden - May 2009

The Alpine Community Garden is off to a great start! We've got all but about five rows of the 80'x 100' plot planted, and the fence (mostly) in place. If you live nearby, c'mon down to see the progress we've made in the last month. Remember, the Alpine Community Garden is growing food for the Monroe Food Bank, the Senior Lunch Program in Monroe and others in need in our community. "Give what you have, receive what you need." Contact us by email at AlpineCoGarden@gmail.com if you have donations, comments, would like to volunteer or would like to be added or removed from this regular blog-update. Also, if you are local and know of anyone with mulch materials who may not get this blog, please forward it, or give them our number. Thanks. Chris and Llyn 541-847-8797

Today's blog is about the benefits of mulching your garden. We are in need of significant quantities of mulch. Ideally we prefer bedding straw (either baled or raked out of animal stalls), spoiled hay (maybe you have some bails that are moldy or otherwise unsuitable for feeding to livestock that we could use in the garden), leaves from last fall (it's probably too late to rake them from under trees but if you've got a big pile we could collect, we'd be interested.) or grass clippings (either in a pile, or drying on your lawn, so we can rake them up) . Ideally, we'd love to have mulch-materials delivered to the garden but let us know what you've got and maybe we can come collect them from your home or farm.


Autumn Leaves Mulching the Broccoli and Peas from a Previous garden

The next big step for the garden's health involves a heavy mulching on the pathways between the rows. The method of organic gardening that we're doing focuses on feeding the soil and nourishing a healthy environment for worms, beneficial insects and micro-organisms. Soil is composed of sand, clay and decomposing plant/organic material (bio-mass). If these components are out of balance, crops will suffer. Mulching adds bio-mass to the soil, helps retain moisture (so you don't have to water as much) and, along with worm castings, compost and the small amount of organic fertilizer were adding, literally feeds your mini-livestock (worms, bugs and micro-organisms). They in turn correct the acid/alkaline balance in the soil, dig little tunnels that provide easy pathways for the plant's rootlets to grow into and digest the mulch thereby making all the nutrients locked into the bio-mass available to your garden, (worm poop (or castings) is like vitamins for your soil!) . Mulching also blocks weeds from getting sunlight so they can't grow, which cuts down on the need for weeding.

As we have prepared the garden this first year in Alpine, we dug soil out of the paths and heaped it in mounded rows. This makes the soil deeper and looser in the rows, making it easier for plants to grow. We will mulch heavily, primarily in the paths where we walk. Though we've got exceptionally good soil for a first-year garden, it seems that it has more clay than is ideal. The mulch we add in the paths between rows will decompose from sun and rain and worms and micro-organisms and make next-year's garden even better because of this added plant matter.

Many people don't realize that a plant's root system may reach out well into the pathways. Another advantage of mulching is that you make the soil less likely to become compacted in the pathways, and it's also more pleasant to be on your knees when weeding, or harvesting plants.

Here are the kinds of mulch we prefer, and why:


Bedding straw:
Straw is from the stalks left standing after grains are harvested (wheat, barley, rye). It consists just of the lower stems of the plant. We prefer the straw because it doesn't have as many seed-heads (which means less weeding for us). We can use straw straight out of the bale, or raked out of animal stalls. The benefit of used straw is that it contains urine and manure from the livestock which functions as fertilizer for the garden. We can also use spoiled hay. (Pictured at left) (If you are using straw or hay to build your compost piles, or deeply mulch your garden, please read our post about Herbicide Contamination of Compost, Manure and Mulch)


Autumn Leaves: Leaves from maples and fruit-trees are some of our favorites. In the fall we either put them directly in the garden rows so they will decompose over the winter or rake them into big piles and cover them in plastic for use in the spring. Not all leaves are beneficial. Walnut leaves (for example) are toxic to many plants and will retard their growth or actually kill them. (Below: A big load of autumn leaves diverted from the landfill/burn-pile)


Grass Clippings: Some people like to leave grass clippings on their lawns/fields because they act as a mulch and fertilizer for the growing grass. Other people have collection-bags on their mowers and pile their grass clippings in one place. Grass clippings make an excellent garden mulch and fertilizer as they are easy to spread and compost readily making the nutrients easily available to your plants. We don't recommend bagging up your lawn clippings because they will become a stinky, gooey mess if they decompose in an airtight container or bag. If you wish to save grass clippings for later use, either leave them in the lawn/field for a few days in the sun and rake them after they've dried or use your bagger-mower to collect and then spread them just a few inches thick on a large sheet of plastic, in the sun, and they will dry quickly. Then you can store them in bags for use at a later time. (Below: Spoiled hay mulching on a lawns-to-gardens project. Cox Lane Garden)


In this 'full-circle' style of gardening, we are always looking for ways to pull materials out of the waste stream (taking up room at the land-fill, or being burned in burn-piles) and save money by re-using and recycling. In the garden, "one man's trash" can truly be "another man's treasure". Let us know if you have any of these mulching materials available, so we can take them off your hands and turn them into 'garden treasure'. Chris and Llyn: 847-8797 AlpineCoGarden@gmail.com
Thank you to Gary Weems for donating time and materials to get the toilet working again at the Alpine Park. Thanks to Steve and Beatrice Rose for housing our tomato-starts in their greenhouse this spring. Thanks to Patty Parsons for writing the grant and to the South Benton Foundation for awarding our project $350 (this means that cash donations have now surpassed $1000.) Thank you to Dorothy Brinckerhoff for being our treasurer (and all-around go-to gal!). We also appreciate Phil Hawkins and Emily Smith for the picture spread and article that featured our Alpine Park clean-up day in the Tri-County news.


Fun in the leaf pile!