 |
| Our newest greenhouse - the Sunship - Sept. 2016 |
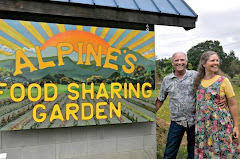
Greetings
everyone! Here we are heading into our ninth year with the Sharing
Gardens, Can you believe it? From our humble beginnings at Alpine Park,
with an 80'x80' garden-plot, an 8'x8' greenhouse, a handful of tools and
willing spirits we've grown to the thriving, expanded project we are
today.
In the beginning, we didn't even have pictures to use on our website so borrowed photos Chris had taken in previous gardens.
LINK to first Post - A Seed is Planted
Our readership has steadily grown over the years and is currently
experiencing a surge in readership that peaked with over 17,000
site-visits in December 2016 alone! It has tapered off slightly since
this peak but we are still averaging 300 visits per day. These visits
come from all over the planet both for practical gardening knowledge and
for inspiration about the power and joys of generosity.
 |
| Home-grown dinner! |
This post features info about what happens at the Sharing Gardens during the winter months. Enjoy! From
December through about mid-February, activity in the gardens is
minimal. Here in the Willamette Valley of Oregon, our winters are
typically cold and rainy (with occasional snow and freezing
temperatures) and the shorter day-lengths mean that any plants that are
still growing in our greenhouses (kale, fava-beans) just maintain their
current size, without adding any growth until days get longer.
So, just what DO we do to prepare for the coming Spring?
Because
we practice a style of gardening that requires deep mulch, even in our
greenhouses, the winter is time for preparing beds.
Preparing Garden Beds - One Low-Tech Way-LINK
 |
| Our largest greenhouse with tomato plants on left, peppers and fig-trees on right. October 2016. |
As the season comes to a close, and the last of the summer crops have been harvested, we rake away the left-over straw from the
paths of the greenhouses. We remove cages from the tomato and pepper plants
, cut
them off at ground level and cut them stems up in 6" - 8" pieces and
put these pieces in the paths underfoot. The stems are too course to
decompose by planting time which is why we don't cut them in the garden
beds.
Cutting them speeds up decomposition and, by the time plant-roots are
reaching out under the greenhouse paths, the stems will be almost
entirely broken-down.
The next step is to cover the
paths with the straw raked off prior to cutting up the plants. Clear any
remaining straw, or plant matter off the greenhouse
beds. The garden-
beds - where we'll be planting in the spring - are generously sprinkled with coffee-grounds, and a dusting of wood-ashes.
 |
| Greenhouse beds covered in 1/2' coffee-grounds and a light dusting of wood-ashes. |
We
have been experimenting with creating greater soil-fertility using
coffee grounds and wood-ashes. Coffee grounds are available for free
from most coffee-shops; they're grateful to have someone come pick them
up! And though they're not sustainable, they are a free resource at this
time. For some reason, red-wiggler worms (also called manure worms)
just love coffee! If you spread it liberally on your soil, they will
migrate to find it. Their worm poo (castings) provides many nutrients
that plants love and the tunnels they make help aerate the soil. Wood
ashes should be used sparingly; they are very potent but provide a
bounty of minerals to the soil.
 |
| Worms love coffee grounds! |
Coffee grounds provide generous amounts of phosphorus, potassium, magnesium, and copper. They also release nitrogen into the soil as they degrade. When we have it,
we spread it about 1/2" thick. We also layer it into our compost piles.
Coffee grounds - Will They perk Up Plants - LINK
Wood Ashes provide all necessary nutrients except
nitrogen and sulfur.
We
use ashes from our wood-stove (that heats our house). We use only
newspaper to start the fires and burn pure wood. We don't burn anything
with paint; no ply-wood or other man-made products so the chemicals in
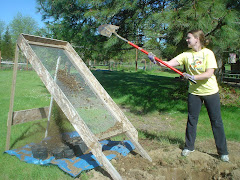
them don't get into our food-chain. We sift the ashes to remove any big
chunks, nails or screws. Be very careful not to use too much!
We put just the lightest dusting in our beds. Do not use wood-ash to make a potting soil. It is caustic to worms and will alkalize your soil so use only a little and wait before planting seeds or seedlings
.
Do not use around acid-loving plants (like blueberries, or in
potato-beds). Article from our local University Extension Service:
Wood Ashes Can Benefit Lawn and Garden
 |
| Chris adds leaves to the greenhouse-beds - about 6" is ideal. |
Next
we add a thick layer of leaves, a layer of straw and, if we have it,
green-grass clippings and more coffee grounds. Ideally we cover each
garden bed with a layer of carpet, or cardboard - to keep in moisture
and hasten decomposition, but sometimes we just leave the rows open to
the air. All this organic matter is slowly eaten from below by worms and
fungi and bacteria. In the spring, these beds will be ready to plant
our new crops.
 |
| December
2016. Note trellises for winter-peas, a re-purposing project from an
old chicken-coop (from left, to center). Light-green carpet covers row
in lower-right corner. |
Winter is also a time for pruning our fruit trees and blackberry bushes. Pruning
helps fruit trees stay healthy and productive. Almost all our fruit
trees were mangled by deer in their first year and a half so we still
haven't had much fruit from them yet. Most of them have lots of
fruit-spurs this winter so we're hoping that 2017 brings more fruit. In a
few years' time, our 3-dozen apples, pears and plums should yield
enough surplus that we can share the bounty with local food-charities.
 |
| August 2016. Here is our first harvest from an Asian pear we planted in 2014. Not much, but they sure were delicious! |
 |
| We've been enjoying herbal tea made from rosehips and fennel-seeds we grew and dried. Here are rosehips from rosa rugosa a hedge-rose that grows well in our climate that we started from seed three years ago. |
 |
| October
2016. In mid-Autumn, we mulched most of our outdoor garden-beds with
leaves and straw so they will be ready for planting in the spring. Chris
looked under this straw just last week and found many worms! Even
though the ground is saturated from winter-rains, the worms thrive at
the surface where the straw meets the ground. |
 |
| January/February is the time to plant biennial, root-crops for seed. |
Carrots, beets and onions all produce seed in their
second year
so you
must save them in your refrigerator or a root cellar and re-plant them
to grow-out for seed. We plant them in gallon pots in January or
February and than transplant them into the ground later in the spring.
Seed-harvest occurs through much of the summer-months.
 |
| Tomatoes, peppers and squash make a bright compost pile! |
We continue to build our compost piles. We
don't have as much material to add to them at this time of year as the
garden-debris has mostly been collected. The bins we are filling now
won't be ready to use in the gardens till summer-time but you can never
have too much!
We continue to
process food for long-term storage.
Llyn likes to make pumpkin-pie filling for freezing. In early January
she noticed some of our Provence squash was showing signs of rotting so
she had a marathon session and froze ingredients to make 22 pies. Yum!
Making Pumpkin Pie from Scratch - Recipe - LINK
 |
| Baking Provence squash, a favorite for pie! Yes, it really is that orange, and so sweet! |
Winter is also time for
indoor-construction projects. Below, is a
wood stove that Chris made from a kit that comes with legs, a collar and door for the
stove. Holes must be cut out of the barrel using a metal-cutting saw. We purchased a used barrel from a
food warehouse and
Chris discovered that the barrel we bought for $4 had almost a gallon of
honey still in the bottom which he drained and we enjoy on our toast!
 |
| Here's a wood stove that Chris made from a kit. |
 |
| Cleaning and lubricating hose-fittings, valves and timers so they'll be ready to use in the spring. |
Each summer we dedicate a sizable amount of garden space to crops that store well:
winter squash, potatoes, beets, carrots and storage onions to name a
few. We want
to be able to augment the Food Pantry's fresh produce offerings for as
long as possible when their donations from other local sources begin to
diminish. To be honest though, by the time all our share-givers receive
their share of winter crops, the only thing we really have surplus for
the Food Pantry is winter squash. Perhaps
in future years we'll be able to increase our output, or other local
gardens will join us in the project and dedicate a row of their space to
storage crops to share.
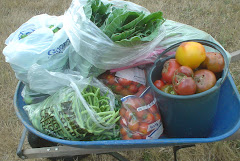
Last week we delivered the last of our winter-squash and hot-peppers
that we had saved to share with the Food Pantry. Because we plant our peppers and tomatoes
in greenhouses, we can harvest them after everything outside is
drooping and dying from heavy Autumn rains. We
do have to harvest them
before the first hard-freeze or they'll rot on the plant, even in the greenhouses. Our last harvest this year was December 6th!
 |
| The last of summer-harvest! Dec. 2016. |
We
are so grateful that the winter solstice has passed and that days are
getting longer! In another six weeks (mid-February) it will be time to
start seeds again for cool-weather crops (onions, cabbage, broccoli,
lettuce, to name a few). Still plenty of time to finish our pruning,
paint some more signs, clean and organize our garden-sheds and workshop
and perform other maintenance tasks.
 |
| August 2016. Can't wait for next year's tomatoes! |
The Sharing Gardens project is a unique model of community garden that
is 100% non-commercial, uses local materials for soil-fertility, provides
thousands of pounds of free produce to local food-charities and
encourages gardening as a way to increase wildlife habitat.


