Our new and improved site

(with the same content as this one, AND MORE!) is

www.The SharingGardens.blogspot.com/

Showing posts with label recycling. Show all posts

Monday, April 15, 2013

Carport-Frame Greenhouse Design

Quite a handsome little greenhouse, don't you think!

One of the guiding principles of the Sharing Gardens is to Re-use and Re-purpose as many materials as we can - to keep them out of burn-piles, and the dump. This carport greenhouse was made with 100% salvaged and donated materials (we didn't spend a penny!) Such a beautiful demonstration of what the Sharing Gardens are all about!

Here is a greenhouse we made using a metal carport frame, pressure-treated lumber and plywood. (Finished size - 10' x 20') We had a door and aluminum windows to use as well, though we've made vents and doors in other greenhouses by framing them with 2 x 4 lumber and covering in plywood, or plastic. We've assembled it entirely with screws, which makes it possible to disassemble and move. Someone donated the aluminum track (Spring Lock) to attach the plastic but it can be expensive to buy it new. On other greenhouses we've built, we've used long strips of lathe to screw down the plastic.

Finished carport greenhouse - side view.


North end. Note unpainted vent-door at peak. Greenhouse is cooled by convection; cool air comes in lower windows at south end and exits through upper vent and door. Window on left is also operable.
North end from inside. Plywood construction means you can hang shelves/tool rack.
South end is all glass (two sliding windows) and greenhouse plastic for maximum light.
Here are some close-ups for construction details:

Begin by setting up frame on level ground with the ends facing north and south.

Use 2 x 4's to frame side-walls. Upright metal posts are on bricks or blocks of wood to keep structure level and prevent it from sinking into the ground. Any wood that touches the ground should be pressure-treated.
Splicing 2 x 4's. The inner board makes a nice support for a shelf or tables.
The next step is to install a pressure-treated 6 x 6 across the bottom of the end walls. In our case, we spliced two shorter pieces together with a full-length 2 x 6. Keep making the structure level and square. This will make the rest of your framing much easier.
We use metal plumber's tape to secure sides to poles. Note painted cedar 1 x 4 "sill" and metal track (Spring Lock) to attach plastic.
Detail of inner walls. If you don't have corrugated fiber-glass, you can simply use more greenhouse plastic, or plywood.
Detail - outer corner. Note - we used 2 - 8" lag bolts to fasten lower corner to 6 x 6.
Detail - inner corner.

South wall, ready for framing and windows.
Next stage is to frame the end-walls:
This shows one of many possible variations for framing end wall. You need framing for windows or vents and to be able to attach plastic all the way around.

North wall framed for door and vent above door.


Framing details: 


Upper corner detail. 2 x 4's cut with a reciprocating saw (Sawzall).

More end wall:
Aluminum-framed, sliding windows for ventilation.

South wall framing.

Inside north wall (still needs vent above door).

Attaching plastic:
This is what the Spring Lock track looks like. The plastic is laid in the track and locked into place with the "wiggle wire".

Detail of corner showing plastic wrapped around and attached on end-wall, and along 1 x 4 sill on side with Spring Lock and wiggle-wire.

Plastic attached along sill. The nice thing about Spring Lock is that you can go back and stretch plastic to be taught and even (which we did after this picture was taken).

Skid-free ramp.
Greenhouse in use:

Jen and Doreen transplanting peppers.

Our new friend Austin, getting a transplanting lesson from Llyn.
To see other "How To" articles, go to our new and improved site: http://thesharinggardens.blogspot.com/

If you have questions or suggestions for improvements, please comment below.

Friday, May 4, 2012

Grass Clippings and Leaves for Fertilizer/Mulch


photo: Muhammad Sajjad
Turning over a new leaf
Leaves, grass clippings and other yard "waste" make excellent fertilizer for garden soil. We have been demonstrating this at the Sharing Gardens with vegetable yields in the tons (2012 Harvest Totals). My husband Chris also demonstrated a great increase in fertility using yard "waste" on his 5-acre farm in the high-desert country NE of Mt. Shasta, California (back in the 1980's - '90's). Within a short amount of time, using only leaves and grass clippings, alfalfa-powder that he collected from the floor of a pellet mill nearby, and a modest amount of goat and chicken manure from his own livestock, Chris turned volcanic soil, the consistency of beach-sand, into a garden that inspired Organic Gardening Magazine to write an article about him called "Defying the Odds on a High-Desert Oasis" (March 1991). Chris' gardens were so bounteous and beautiful that his farm was nicknamed "Findhorn West!"

Feed your worms and other "micro-livestock" directly in the soil!
We have already written several posts that go into great detail about the simple methods we use at the Sharing Gardens, using local materials, to increase fertility (links below). In essence, our method is to feed the soil with leaves, lawn-clippings, spoiled hay and vegetable scraps, weeds and the plants we pull at the end of the season to feed the "micro-livestock" (worms, bacteria and other "composters"). As these garden-partners eat their way through the yard and garden "waste" we provide for them, they fertilize the soil with their manure and create minute tunnels that keep the ground from compacting.

Organic Matter, the "The First Amendment"
As our dear friend, James Cassidy (professor of Soil Science at Oregon State University) likes to say about soil health, no matter what challenges you are facing, the answer is always "add organic matter!"

Here is a step-by-step guide to one of the methods we use at the Sharing Gardens to increase the fertility and tilth of the soil using a lot of grass clippings combined with dry leaves.

Two to three weeks before planting in a bed, spread a layer of leaves and grass clippings and till them in.

1. Thinly distribute dry leaves over the surface of your grass. You want there to be more grass clippings than leaves in your final mix. It'll be much easier to do with dry leaves saved from the previous Fall.
Maple and fruit trees have thinnest leaves that break down quickest. Avoid walnut leaves as they will make your soil toxic to your seedlings. Oak and other thicker leaves work fine -- just mix in more grass clippings than with thinner leaves.

2. Run the mower over the leaves/lawn, using a catcher-bag to collect them. Set mower at a higher setting. Sometimes you may have to lift and lower mower to avoid stalling.
3. Distribute them about 1" - 2" thick in garden beds. You can till first, or lay the grass/leaves out and then till them in.

4. Till grass/leaf combo into the soil passing over the bed two to four times to work them in well.
5. Worms and soil organisms will decompose them enough in 2-3 weeks for you to begin transplanting.
6. Stand back and watch your vegetables grow!
You don't have to spend lots of money on soil amendments, to yield beautiful results!
Note: if you use plain, fresh grass clippings (no leaves), they can be quite hot, if laid on thick. If used as a mulch around plants, be sure they don't actually touch the stems or leaves of the plants.
John mulches lettuce and broccoli using fresh grass-clippings.
Other related posts from the Sharing Gardens:
Preparing Garden Beds - One Low-Tech Way

Hay-Bale Compost

More on Mulch

Mulch We Love, and Why 

Benefits of Deep Mulching

CLICK HERE for article (from your Organic Garden) about using leaves to build healthy soil.

Raking grass - a local resource.
But could it really be so simple? 
In the beginning (if you are starting with a new garden site), or even as you transition from using commercially available soil amendments, you may need to use a pre-mixed, organic fertilizer, or concentrated materials applied judiciously, in addition to leaves, grass clippings etc. For example, in the first years of the Alpine, and Monroe Sharing Gardens we used rabbit and llama manure (dried and sifted as part of our nursery/potting mix, or worked into the hole with transplants.) We used an all-purpose, organic fertilizer in this same way, along with some kelp powder (for minerals and micro-nutrients). At times we have also used fish, or seaweed liquid concentrates as a "foliar feeder" (diluted with water and sprayed on plants when they showed signs of mineral depletion or stress.) But our primary methods of maximizing the fertility of our soil have been through mulching deeply using locally available "waste products": Leaves, grass clippings and spoiled hay (wet or moldy hay that can no longer be used as feed or bedding for livestock).

Volunteers sharing in the harvest. Now that's local!
Taking local food production to a new level
One hot topic these days is "eating local".  A "locavore" is someone who endeavors to eat foods grown or produced within a certain radius (for example, 100 miles). There are many reasons a person might choose to eat more "locally" but one common reason is to live lighter on the planet by reducing the amount of fuel needed to transport food. While this is an important piece of the puzzle, it's also important to go a step further to look also at where the fertilizers and other soil amendments come from. Even if the food you eat travels less than 100 miles, if the soil was fertilized with products that came from half-way around the world, this radically increases the "carbon footprint."  Many of these soil amendments also involve aggressive mining, or extraction methods that are environmentally damaging and threaten the delicate balance of life. Many of the sources for these materials are in increasingly shorter supply, making the long-term use of them unsustainable. Also, for people who choose to eat a vegan, or vegetarian diet, their use in growing vegetables is undesirable (ex: feather-meal, bonemeal and other slaughter-house by-products).

Don't treat your soil like "dirt".
As an overall philosophy, we feel it is better to work with nature and cooperate with the processes of soil-building and fertility that have evolved over eons, than to assume the role of a soil magician, concocting potions and powders, mixes and methods that can be complicated, costly and often disruptive to the health of your soil. The good news is that most, if not all of these products can be supplemented, and eventually replaced by resources that are local, renewable and sustainable: leaves, lawn clippings, kelp concentrates (powder and liquid) and modest amounts of animal manure.

Finding local sources
If you don't live in an area that will deliver leaves, or you don't have a site big enough to warrant a full dump-truck load deposited, here are some other ideas:
  • Offer to rake your neighbors leaves in exchange for using them in your garden.
  • Approach your neighbors about bringing you their bags of leaves.
  • Organize a "leaf co-op" where a group of gardening friends rake and share the leaves they gather.
  • Organize your local scout troop, or 4-H, or youth group to spend a few Saturdays in a row raking leaves in the neighborhood. You can offer this service 'by donation' and collect funds for the youth group's other activities.
  • Put an add on 'Craig's List' requesting leaves.
  • Set up a site at the local dump or transfer station.
Collection station Chris set up at the local dump in Mt Shasta, CA (1980's).
This last solution is one that my husband Chris, implemented quite successfully at his previous farm. At that time, yard "waste" was a real issue as it took up valuable space at the land-fill and meant that they would have to close and find new places to dump the community's refuse. Also, in many rural areas, instead of paying dump-fees, many people gather their leaves and burn them which not only deprives the soil of these valuable nutrients but adds to air pollution as well. Chris made an arrangement with the dump's manager whereby he set up a chain-link enclosure as a collection-site for yard waste and had a separate area for nursery pots and flats. Whenever the enclosure was full, Chris would get a call from the manager, and go pick up the load.

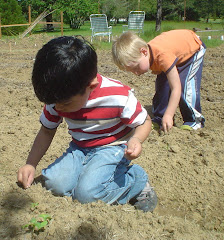
We're all just kids in the garden!
Whenever we write one of these "how-to" posts we try to add a couple of caveats: One is that, there are just about as many different ways to grow a garden as there are gardeners and this is just our way. Two: Gardening is a very dynamic process; each garden site is different, and each year the same garden site is different due to the weather and other shifting conditions. So, while these methods reflect what we're doing these days, check back in another year and see if we've evolved it further!

Please read our post about Herbicide Contamination of Compost, Manure and Mulch

Sunday, May 24, 2009

Mulch-es Gracias


Alpine Community Garden - May 2009

The Alpine Community Garden is off to a great start! We've got all but about five rows of the 80'x 100' plot planted, and the fence (mostly) in place. If you live nearby, c'mon down to see the progress we've made in the last month. Remember, the Alpine Community Garden is growing food for the Monroe Food Bank, the Senior Lunch Program in Monroe and others in need in our community. "Give what you have, receive what you need." Contact us by email at AlpineCoGarden@gmail.com if you have donations, comments, would like to volunteer or would like to be added or removed from this regular blog-update. Also, if you are local and know of anyone with mulch materials who may not get this blog, please forward it, or give them our number. Thanks. Chris and Llyn 541-847-8797

Today's blog is about the benefits of mulching your garden. We are in need of significant quantities of mulch. Ideally we prefer bedding straw (either baled or raked out of animal stalls), spoiled hay (maybe you have some bails that are moldy or otherwise unsuitable for feeding to livestock that we could use in the garden), leaves from last fall (it's probably too late to rake them from under trees but if you've got a big pile we could collect, we'd be interested.) or grass clippings (either in a pile, or drying on your lawn, so we can rake them up) . Ideally, we'd love to have mulch-materials delivered to the garden but let us know what you've got and maybe we can come collect them from your home or farm.


Autumn Leaves Mulching the Broccoli and Peas from a Previous garden

The next big step for the garden's health involves a heavy mulching on the pathways between the rows. The method of organic gardening that we're doing focuses on feeding the soil and nourishing a healthy environment for worms, beneficial insects and micro-organisms. Soil is composed of sand, clay and decomposing plant/organic material (bio-mass). If these components are out of balance, crops will suffer. Mulching adds bio-mass to the soil, helps retain moisture (so you don't have to water as much) and, along with worm castings, compost and the small amount of organic fertilizer were adding, literally feeds your mini-livestock (worms, bugs and micro-organisms). They in turn correct the acid/alkaline balance in the soil, dig little tunnels that provide easy pathways for the plant's rootlets to grow into and digest the mulch thereby making all the nutrients locked into the bio-mass available to your garden, (worm poop (or castings) is like vitamins for your soil!) . Mulching also blocks weeds from getting sunlight so they can't grow, which cuts down on the need for weeding.

As we have prepared the garden this first year in Alpine, we dug soil out of the paths and heaped it in mounded rows. This makes the soil deeper and looser in the rows, making it easier for plants to grow. We will mulch heavily, primarily in the paths where we walk. Though we've got exceptionally good soil for a first-year garden, it seems that it has more clay than is ideal. The mulch we add in the paths between rows will decompose from sun and rain and worms and micro-organisms and make next-year's garden even better because of this added plant matter.

Many people don't realize that a plant's root system may reach out well into the pathways. Another advantage of mulching is that you make the soil less likely to become compacted in the pathways, and it's also more pleasant to be on your knees when weeding, or harvesting plants.

Here are the kinds of mulch we prefer, and why:


Bedding straw:
Straw is from the stalks left standing after grains are harvested (wheat, barley, rye). It consists just of the lower stems of the plant. We prefer the straw because it doesn't have as many seed-heads (which means less weeding for us). We can use straw straight out of the bale, or raked out of animal stalls. The benefit of used straw is that it contains urine and manure from the livestock which functions as fertilizer for the garden. We can also use spoiled hay. (Pictured at left) (If you are using straw or hay to build your compost piles, or deeply mulch your garden, please read our post about Herbicide Contamination of Compost, Manure and Mulch)


Autumn Leaves: Leaves from maples and fruit-trees are some of our favorites. In the fall we either put them directly in the garden rows so they will decompose over the winter or rake them into big piles and cover them in plastic for use in the spring. Not all leaves are beneficial. Walnut leaves (for example) are toxic to many plants and will retard their growth or actually kill them. (Below: A big load of autumn leaves diverted from the landfill/burn-pile)


Grass Clippings: Some people like to leave grass clippings on their lawns/fields because they act as a mulch and fertilizer for the growing grass. Other people have collection-bags on their mowers and pile their grass clippings in one place. Grass clippings make an excellent garden mulch and fertilizer as they are easy to spread and compost readily making the nutrients easily available to your plants. We don't recommend bagging up your lawn clippings because they will become a stinky, gooey mess if they decompose in an airtight container or bag. If you wish to save grass clippings for later use, either leave them in the lawn/field for a few days in the sun and rake them after they've dried or use your bagger-mower to collect and then spread them just a few inches thick on a large sheet of plastic, in the sun, and they will dry quickly. Then you can store them in bags for use at a later time. (Below: Spoiled hay mulching on a lawns-to-gardens project. Cox Lane Garden)


In this 'full-circle' style of gardening, we are always looking for ways to pull materials out of the waste stream (taking up room at the land-fill, or being burned in burn-piles) and save money by re-using and recycling. In the garden, "one man's trash" can truly be "another man's treasure". Let us know if you have any of these mulching materials available, so we can take them off your hands and turn them into 'garden treasure'. Chris and Llyn: 847-8797 AlpineCoGarden@gmail.com
Thank you to Gary Weems for donating time and materials to get the toilet working again at the Alpine Park. Thanks to Steve and Beatrice Rose for housing our tomato-starts in their greenhouse this spring. Thanks to Patty Parsons for writing the grant and to the South Benton Foundation for awarding our project $350 (this means that cash donations have now surpassed $1000.) Thank you to Dorothy Brinckerhoff for being our treasurer (and all-around go-to gal!). We also appreciate Phil Hawkins and Emily Smith for the picture spread and article that featured our Alpine Park clean-up day in the Tri-County news.


Fun in the leaf pile!

Tuesday, May 12, 2009

Carrot Planting

Gardening is like any art-form. There are basic recipes and styles that most people agree on, and there's a lot of room for variation and personal adaptations to your own site and skills. These garden tips are our own 'best practices'; techniques that Chris has learned and adapted from others experience over his 40 years of growing food. We offer them as a starting place for the new gardener, and hope to offer a few new tips or variations that are of value to established gardeners. We welcome your comments and contributions to this blog. To contribute, go to: http://AlpineGarden.blogspot.com/

To prepare a bed for carrots
, you need to dig down deep and really loosen the soil. Eighteen inches is optimal. Bust up any clods, or rake them off the surface till you have a flat, clodless, level bed.

We're using soaker hoses to get things started this year so we laid one down the center of the bed. This will water seedlings on both sides. When you lay out soaker hoses, it's best not to do it in lengths much more than 50 feet. The water pressure diminishes as you move down the hose and the plants at the tail end of the hose won't get as much water as those at the head. We have fashioned soaker hose clips (to hold them in place) with old plastic coat hangers we've clipped in the shape of hooks.

Take a stick or sharp trowel and create a groove in the soil on either side of the soaker hose.


Carrots don't like a lot of fertilizer but, since we're starting this garden from scratch, and the soil hasn't ever been built-up, we use a small amount, sprinkling lightly, of "All-Purpose" organic fertilizer. We get this from our local organic-supportive garden supply store. ('Down to Earth' is our favorite, in Eugene, OR) It has all the micro and macro nutrients needed for healthy plant growth, in a balanced form and it isn't too "hot"; it won't burn the seedlings as they grow like some uncomposted manures can.


The next step is to sow the seeds. Carrot seeds are quite tiny. The trick is to make a line of them with about one seed per inch. If they're spread much further, and some don't germinate, you'll have big gaps in your bed. If you sow them much thicker, you'll have a lot of thinning to do later (ultimately you want about an inch and a half between seedlings). Carrot seedlings are tiny, delicate little beings and easily confused with some kinds of weeds. So, save yourself trouble later and gently distribute them along the groove in an even, well-spaced manner.

Next, using the back edge of a garden rake, gently push 1/4 to 1/2 inch soil back over the seeds. They just want the merest covering so they don't have far to grow to get to the sunlight. The last step in planting is to tap the soil down on top of the seeds. Again, using the back of the rake, use a gentle tapping motion along the row. This helps settle the soil around the seeds and creates a groove for water to collect and nurture your young plants. Remove grass or dirt clods as you go, either break them up or pull them out of your row so the seedlings don't have to struggle to grow around or through them. Carrots like it easy. Here's a short video clip showing the technique we use for tamping down the soil:


Give your carrots a light watering with the sprinkler head of your hose. This too will help settle the seeds and give them a little head start in their germinating process. Don't over water. The seeds don't need much and if you water heavily you risk floating the seeds into clumps and undoing your careful job of spacing them along the row.


We hope you find these garden blogs informative and useful but we don't wish to burden your in-box. If you wish to be removed from our list, for any reason, please let us know: AlpineCoGarden@gmail.com

Monday, April 13, 2009

Got fence posts? Yes we do!

Due to the great generosity of Mylrea and Ray on Kyle Rd. we have all the ten-foot metal "T"-posts that we need to put up the fence at the Alpine Community Garden. We still need the pressure-treated wooden posts (probably a dozen of them) so if you have any lying around that are just gathering blackberry vines, just let us know and we'll come liberate them before the vines get too nasty.


Chris and I planted a whole bunch of seeds today in our greenhouse (note the re-used tofu containers in the picture below. and "no", the seedlings didn't just pop-up today ). These are plants that need a longer growing season than they would get if we waited to direct-sow them: melons, squash, cucumbers, a few herbs and flowers.


We've planted strictly "heirloom" varieties. These are non-hybrid seeds, or "open-pollinated" varieties that have been created through generations by farmers who selected the best fruits and vegetables and preserved their seed for planting in subsequent seasons. For example, last year we saved the seed from the first tomato that ripened on the vine with the hope that its offspring will also be early bloomers.

Hybrid seeds are created by the big seed companies by purposely crossing two types of plants to give one generation of plants with certain qualities. If you save seeds from hybrid plants and try to grow them out in later years, you will not have any guarantee that the seeds will grow "true" and have the same qualities as the original seeds, or they might not even sprout at all.

If you are interested in following along and learning how to save seeds for your own future gardens, keep your eyes out for good seed-saving containers: they should ideally be glass or plastic and seal air-tight. Zip-lock bags work well too. We like re-using materials as much as possible to keep them out of the waste stream.