Our new and improved site

(with the same content as this one, AND MORE!) is

www.The SharingGardens.blogspot.com/

Monday, April 15, 2013

Carport-Frame Greenhouse Design

Quite a handsome little greenhouse, don't you think!

One of the guiding principles of the Sharing Gardens is to Re-use and Re-purpose as many materials as we can - to keep them out of burn-piles, and the dump. This carport greenhouse was made with 100% salvaged and donated materials (we didn't spend a penny!) Such a beautiful demonstration of what the Sharing Gardens are all about!

Here is a greenhouse we made using a metal carport frame, pressure-treated lumber and plywood. (Finished size - 10' x 20') We had a door and aluminum windows to use as well, though we've made vents and doors in other greenhouses by framing them with 2 x 4 lumber and covering in plywood, or plastic. We've assembled it entirely with screws, which makes it possible to disassemble and move. Someone donated the aluminum track (Spring Lock) to attach the plastic but it can be expensive to buy it new. On other greenhouses we've built, we've used long strips of lathe to screw down the plastic.

Finished carport greenhouse - side view.


North end. Note unpainted vent-door at peak. Greenhouse is cooled by convection; cool air comes in lower windows at south end and exits through upper vent and door. Window on left is also operable.
North end from inside. Plywood construction means you can hang shelves/tool rack.
South end is all glass (two sliding windows) and greenhouse plastic for maximum light.
Here are some close-ups for construction details:

Begin by setting up frame on level ground with the ends facing north and south.

Use 2 x 4's to frame side-walls. Upright metal posts are on bricks or blocks of wood to keep structure level and prevent it from sinking into the ground. Any wood that touches the ground should be pressure-treated.
Splicing 2 x 4's. The inner board makes a nice support for a shelf or tables.
The next step is to install a pressure-treated 6 x 6 across the bottom of the end walls. In our case, we spliced two shorter pieces together with a full-length 2 x 6. Keep making the structure level and square. This will make the rest of your framing much easier.
We use metal plumber's tape to secure sides to poles. Note painted cedar 1 x 4 "sill" and metal track (Spring Lock) to attach plastic.
Detail of inner walls. If you don't have corrugated fiber-glass, you can simply use more greenhouse plastic, or plywood.
Detail - outer corner. Note - we used 2 - 8" lag bolts to fasten lower corner to 6 x 6.
Detail - inner corner.

South wall, ready for framing and windows.
Next stage is to frame the end-walls:
This shows one of many possible variations for framing end wall. You need framing for windows or vents and to be able to attach plastic all the way around.

North wall framed for door and vent above door.


Framing details: 


Upper corner detail. 2 x 4's cut with a reciprocating saw (Sawzall).

More end wall:
Aluminum-framed, sliding windows for ventilation.

South wall framing.

Inside north wall (still needs vent above door).

Attaching plastic:
This is what the Spring Lock track looks like. The plastic is laid in the track and locked into place with the "wiggle wire".

Detail of corner showing plastic wrapped around and attached on end-wall, and along 1 x 4 sill on side with Spring Lock and wiggle-wire.

Plastic attached along sill. The nice thing about Spring Lock is that you can go back and stretch plastic to be taught and even (which we did after this picture was taken).

Skid-free ramp.
Greenhouse in use:

Jen and Doreen transplanting peppers.

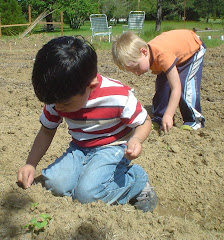
Our new friend Austin, getting a transplanting lesson from Llyn.
To see other "How To" articles, go to our new and improved site: http://thesharinggardens.blogspot.com/

If you have questions or suggestions for improvements, please comment below.

Friday, May 4, 2012

Grass Clippings and Leaves for Fertilizer/Mulch


photo: Muhammad Sajjad
Turning over a new leaf
Leaves, grass clippings and other yard "waste" make excellent fertilizer for garden soil. We have been demonstrating this at the Sharing Gardens with vegetable yields in the tons (2012 Harvest Totals). My husband Chris also demonstrated a great increase in fertility using yard "waste" on his 5-acre farm in the high-desert country NE of Mt. Shasta, California (back in the 1980's - '90's). Within a short amount of time, using only leaves and grass clippings, alfalfa-powder that he collected from the floor of a pellet mill nearby, and a modest amount of goat and chicken manure from his own livestock, Chris turned volcanic soil, the consistency of beach-sand, into a garden that inspired Organic Gardening Magazine to write an article about him called "Defying the Odds on a High-Desert Oasis" (March 1991). Chris' gardens were so bounteous and beautiful that his farm was nicknamed "Findhorn West!"

Feed your worms and other "micro-livestock" directly in the soil!
We have already written several posts that go into great detail about the simple methods we use at the Sharing Gardens, using local materials, to increase fertility (links below). In essence, our method is to feed the soil with leaves, lawn-clippings, spoiled hay and vegetable scraps, weeds and the plants we pull at the end of the season to feed the "micro-livestock" (worms, bacteria and other "composters"). As these garden-partners eat their way through the yard and garden "waste" we provide for them, they fertilize the soil with their manure and create minute tunnels that keep the ground from compacting.

Organic Matter, the "The First Amendment"
As our dear friend, James Cassidy (professor of Soil Science at Oregon State University) likes to say about soil health, no matter what challenges you are facing, the answer is always "add organic matter!"

Here is a step-by-step guide to one of the methods we use at the Sharing Gardens to increase the fertility and tilth of the soil using a lot of grass clippings combined with dry leaves.

Two to three weeks before planting in a bed, spread a layer of leaves and grass clippings and till them in.

1. Thinly distribute dry leaves over the surface of your grass. You want there to be more grass clippings than leaves in your final mix. It'll be much easier to do with dry leaves saved from the previous Fall.
Maple and fruit trees have thinnest leaves that break down quickest. Avoid walnut leaves as they will make your soil toxic to your seedlings. Oak and other thicker leaves work fine -- just mix in more grass clippings than with thinner leaves.

2. Run the mower over the leaves/lawn, using a catcher-bag to collect them. Set mower at a higher setting. Sometimes you may have to lift and lower mower to avoid stalling.
3. Distribute them about 1" - 2" thick in garden beds. You can till first, or lay the grass/leaves out and then till them in.

4. Till grass/leaf combo into the soil passing over the bed two to four times to work them in well.
5. Worms and soil organisms will decompose them enough in 2-3 weeks for you to begin transplanting.
6. Stand back and watch your vegetables grow!
You don't have to spend lots of money on soil amendments, to yield beautiful results!
Note: if you use plain, fresh grass clippings (no leaves), they can be quite hot, if laid on thick. If used as a mulch around plants, be sure they don't actually touch the stems or leaves of the plants.
John mulches lettuce and broccoli using fresh grass-clippings.
Other related posts from the Sharing Gardens:
Preparing Garden Beds - One Low-Tech Way

Hay-Bale Compost

More on Mulch

Mulch We Love, and Why 

Benefits of Deep Mulching

CLICK HERE for article (from your Organic Garden) about using leaves to build healthy soil.

Raking grass - a local resource.
But could it really be so simple? 
In the beginning (if you are starting with a new garden site), or even as you transition from using commercially available soil amendments, you may need to use a pre-mixed, organic fertilizer, or concentrated materials applied judiciously, in addition to leaves, grass clippings etc. For example, in the first years of the Alpine, and Monroe Sharing Gardens we used rabbit and llama manure (dried and sifted as part of our nursery/potting mix, or worked into the hole with transplants.) We used an all-purpose, organic fertilizer in this same way, along with some kelp powder (for minerals and micro-nutrients). At times we have also used fish, or seaweed liquid concentrates as a "foliar feeder" (diluted with water and sprayed on plants when they showed signs of mineral depletion or stress.) But our primary methods of maximizing the fertility of our soil have been through mulching deeply using locally available "waste products": Leaves, grass clippings and spoiled hay (wet or moldy hay that can no longer be used as feed or bedding for livestock).

Volunteers sharing in the harvest. Now that's local!
Taking local food production to a new level
One hot topic these days is "eating local".  A "locavore" is someone who endeavors to eat foods grown or produced within a certain radius (for example, 100 miles). There are many reasons a person might choose to eat more "locally" but one common reason is to live lighter on the planet by reducing the amount of fuel needed to transport food. While this is an important piece of the puzzle, it's also important to go a step further to look also at where the fertilizers and other soil amendments come from. Even if the food you eat travels less than 100 miles, if the soil was fertilized with products that came from half-way around the world, this radically increases the "carbon footprint."  Many of these soil amendments also involve aggressive mining, or extraction methods that are environmentally damaging and threaten the delicate balance of life. Many of the sources for these materials are in increasingly shorter supply, making the long-term use of them unsustainable. Also, for people who choose to eat a vegan, or vegetarian diet, their use in growing vegetables is undesirable (ex: feather-meal, bonemeal and other slaughter-house by-products).

Don't treat your soil like "dirt".
As an overall philosophy, we feel it is better to work with nature and cooperate with the processes of soil-building and fertility that have evolved over eons, than to assume the role of a soil magician, concocting potions and powders, mixes and methods that can be complicated, costly and often disruptive to the health of your soil. The good news is that most, if not all of these products can be supplemented, and eventually replaced by resources that are local, renewable and sustainable: leaves, lawn clippings, kelp concentrates (powder and liquid) and modest amounts of animal manure.

Finding local sources
If you don't live in an area that will deliver leaves, or you don't have a site big enough to warrant a full dump-truck load deposited, here are some other ideas:
  • Offer to rake your neighbors leaves in exchange for using them in your garden.
  • Approach your neighbors about bringing you their bags of leaves.
  • Organize a "leaf co-op" where a group of gardening friends rake and share the leaves they gather.
  • Organize your local scout troop, or 4-H, or youth group to spend a few Saturdays in a row raking leaves in the neighborhood. You can offer this service 'by donation' and collect funds for the youth group's other activities.
  • Put an add on 'Craig's List' requesting leaves.
  • Set up a site at the local dump or transfer station.
Collection station Chris set up at the local dump in Mt Shasta, CA (1980's).
This last solution is one that my husband Chris, implemented quite successfully at his previous farm. At that time, yard "waste" was a real issue as it took up valuable space at the land-fill and meant that they would have to close and find new places to dump the community's refuse. Also, in many rural areas, instead of paying dump-fees, many people gather their leaves and burn them which not only deprives the soil of these valuable nutrients but adds to air pollution as well. Chris made an arrangement with the dump's manager whereby he set up a chain-link enclosure as a collection-site for yard waste and had a separate area for nursery pots and flats. Whenever the enclosure was full, Chris would get a call from the manager, and go pick up the load.

We're all just kids in the garden!
Whenever we write one of these "how-to" posts we try to add a couple of caveats: One is that, there are just about as many different ways to grow a garden as there are gardeners and this is just our way. Two: Gardening is a very dynamic process; each garden site is different, and each year the same garden site is different due to the weather and other shifting conditions. So, while these methods reflect what we're doing these days, check back in another year and see if we've evolved it further!

Please read our post about Herbicide Contamination of Compost, Manure and Mulch

Thursday, May 3, 2012

Leaving the Nest...Goodbye to Alpine

By Llyn Peabody

After much deliberation and soul-searching, we've decided to close down the Alpine Sharing Garden and focus exclusively on the Monroe site. Since having built the greenhouse (which requires us to water it at least once a day, and open and close vents based on daily and nightly temperatures) we realized it was just going to stretch us too thin to try and manage Alpine as well.

Sign painted by Chris Burns - 4' X 6'

There is a possibility that other people in Alpine may continue to garden there. The Garden Club (a group of about eight people who oversee the park) have agreed to let the fence and the raspberry patch remain. The garden will need major remedial work as much of the grass has already filled in where we had garden beds these last three years. (It's amazing to me how fast it has happened! No need to worry about the lawn coming back!) It's not clear how the garden will be organized and how people can get involved but you can let us know if you want to be put in touch with other interested gardeners and we'll connect you. If there isn't enough interest to keep the Alpine Garden going, the Sharing Gardens will come and remove the fence and use it at the Monroe site as the fencing was all either donated to us, or paid for out of donated funds. The raspberries will be distributed to those who are interested.

Alpine Garden - before the fence

We feel bittersweet at the passing of this milestone. Alpine is where the Sharing Gardens were born and it will always hold happy memories: I remember, before we'd even started the fence, potting up raspberry cuttings donated for use in the gardens and to share with the community. We had an amazing first season that went from ground-breaking on April 15 to our first harvest just three months later on July 13. To me, just new to gardening, it seemed miraculous to turn a lawn into food in such a short time. The Alpine garden was the site for the filming of the Peak Moment TV program (click here to view it) and several fun potlucks. As we frequently gardened without volunteers there, and it was smaller than Monroe, we often felt that Alpine was our sanctuary garden. It provided a place of peace and re-creation. We wish to thank once again, the Garden Club, the Alpine Community Center, all the granting agencies and the dozens of people who gave of their time, money and resources and who helped move the idea from a dream into reality. We couldn't have done it without you.

9.5 weeks after breaking ground

We are very excited about this coming season in Monroe; with  the greenhouse in place we are able to have a continuous supply of starts ready to pop in the ground as space opens up. We're expanding within the fence-line to utilize every available space. We hope to make a shaded area with a picnic table so people can enjoy each other's company while shelling beans, or processing sunflower heads, or whatever other sit-down tasks we can come up with. It's going to be a really nice place to stop by and visit. We hope you will!

14 weeks - 2009


A few specific wish-list items:
  • T-posts or old well-pipe - We need to put up a few more trellises to support tomato cages and beans. Six to eight feet tall would be ideal but we can make the shorter ones work. Slightly bent OK.
  • A T-post puller 
  • Strong wire - also for trellis building. Each row is approximately 70 feet long. 
  • Spoiled hay - we already received a ton and a half of straw from Mark Frystak and the Soggy Bottom Farms. That will probably carry us for another month but when we start to plant tomatoes and squash we'll be in need of another delivery of a couple more tons. Remember, we can give you a tax receipt if you need it.
  • Riding lawn mower with bagger.
Raspberry Bounty!

Friday, April 27, 2012

Lettuce: From Seed to Feed - Part 1: Planting

Red Iceberg Lettuce - a summer rose!
Here in the Pacific NW, we start our lettuce seed in a greenhouse in late February and then transplant the starts out in April or May when conditions allow. We're vegetarians and end up with a lot of those white, plastic, square tofu containers. We've found they make great tubs to start small seedlings. We drill holes in the bottom for drainage, fill with a good potting mix (using the bottom of another tofu tub to pack the soil firmly and make a flat surface for the seeds).

After misting the soil so it is good and damp, we sprinkle the lettuce seeds with our finger-tips trying to have a 100 or so seeds per tofu tub.  Lastly we gently sprinkle a thin lay of cover soil over the seeds and lightly mist to settle the seeds. They must be kept moist but not overly wet or the seeds and starts may rot. Lettuce seed germinates best in a cool soil so don't put it on a heat mat or under a lamp to get it to germinate.

Lettuce seedlings in a tofu container. Using a pen to make holes for transplants.
When the seedlings are about 1/2" - 1" (2 cm) high, they are ready for transplanting. We put ours in regular or "jumbo" six-packs. We use a basic, organic potting soil and add our own fertilizer. To each wheelbarrow of soil we add about two cups of all-purpose organic fertilizer and about a half-gallon of sifted rabbit manure . When germinating tiny seeds (such as lettuce), we sift the soil before adding amendments so the seedlings don't have to push past un-composted bits of bark or wood-chips in the soil. For transplanting, we don't bother to sift the soil.

Transplanting seedlings
For the Sharing Gardens, where we might grow 1,000 or more lettuce plants per season, transplanting is done in large batches. Being systematic in the nursery will save you time and materials and you will have much better results. Have labels ready so you keep track of the varieties you are transplanting. Fill a flat of six-packs and mist it with water and soak the seedlings too. Wet soil is less shocking to transplanted roots than dry. Cupping your hand over the whole tofu-tub of seedlings, flip it over and tap the bottom, catching the whole clump of soil and seedlings in your hand. Gently flip it back over and place it on a tray to catch the loose soil as it drops off.

Seedlings "hardening-off".
Using your finger. a stick or some other object, make a generous hole in each of the cells of the six-packs. Pull off a clump of seedlings and, holding them by their leaves, tease apart a single plant with its roots. On a cool, overcast day you can lay a large number of the seedlings alongside their holes before dropping them in and squeezing the soil around them. If the day is hot or the sun is strong, work in smaller batches so the seedlings don't get shocked. It is very important that all the roots go down into the soil and are covered. If they stick out from the surface, this is called 'J-rooting' and  will often kill the plants as they dry out too easily. This is why you want to dig a generously-sized hole so the rootlets don't catch on the sides as you lower them in. after pressing the soil in around each seedling, water them in gently to settle the soil. Label the tray and move onto the next.

Transplanting peas and lettuce
Depending on warmth and sunlight, and the size of the six-packs you use, your lettuce will be ready to plant in the soil in six to ten weeks. If you stagger your plantings it will mean your lettuce doesn't all come ripe at once. Ideally you wait until the root ball has filled the six-pack cell enough to hold the soil as you pop it out, without being totally root-bound (roots coming through the bottom of the six-pack). A week or two before you transplant into your garden, bring the starts outside and begin "hardening them off". Put them where they will get plenty of sun but not too much wind. They will withstand a light frost but if it is going to get very cold, or doesn't warm up in the day, bring them back into the greenhouse till conditions improve. During this hardening-off period, prepare garden beds so they are ready to receive transplants. In our "deep-mulch/minimal till" gardens, we pull a row of mulch over to the adjacent path (with a pitchfork) and, with a trowel dig a small hole just the size of the lettuce's root-ball. This leaves worm holes intact and lettuce seems to thrive without any roto-tilling needed.

Several weeks after transplanting. Picking individual lettuce leaves for salad.
Here in our area, slugs can be a real problem in the spring. Follow this link for ideas on how to re-use milk cartons or soy-milk containers to thwart off their feasting. Re-Purposing Things We don't find that additional fertilizing is necessary for lettuce plants. They receive enough nutrients from the soil. We hold off on mulching them because we want the sun to warm up and dry out the soil and mulch provides habitat for the slugs. Sometimes, after the lettuce is well established and the soil is warmed up, we mulch with a few inches of grass clippings around our plants. Let the clippings dry out for a few days on a tarp or in a bin. Fresh clippings, if piled thickly, can heat up considerably and burn your plants.

Chris Burns with beautiful lettuce harvest! 2011
We plant our lettuce spaced about 6" - 8" (12 - 15 cm) apart. We harvest them intermittently giving the remaining lettuce room to grow. In the early stages, before the heads are fully formed, we harvest one to three leaves off each plant, rather than clipping whole heads. As the heads become full size we harvest by cutting them off at the root with a paring knife, leaving the roots in the ground to feed the worms.

Fall Crops: Give yourself 45 - 60 days (before hard freezing) to grow your fall crops of lettuce. You can assist your lettuce in germinating if you begin the process in a shaded area so the soil isn't too warm. Once seedlings come up, they will need sunlight to grow but do this outside of the greenhouse so they don't get too hot. Heat triggers the plants to "bolt" (go to seed) even when the plants are very young.

Favorite varieties: Everyone who eats out of our gardens seems to prefer green lettuce to red, or at least to have some green to mix in with the red. (This even includes the bugs who seem to devour the green lettuce much more voraciously!) Our recipients also seem to prefer head lettuce to the "leaf" lettuce. We don't know why this is (maybe just habit...) but we take this into consideration when we plant out our gardens. There are hundreds of varieties of lettuce to choose from. The most popular ones we grew this year were:

Buttercrunch
Chartwell's Romaine
Green and Red Iceberg (home-grown Iceberg lettuce is much more nutritious than store-bought).
Four Seasons (a red Romaine-type lettuce)

Next installment: How to Save Lettuce Seed

Friday, April 20, 2012

Seeds and 'Starts' Giveaway and Fund-raiser - Saturday, April 21

Come see the new greenhouse and take home starts for your garden!
Seeds and 'Starts' Giveaway and Fund-raiser for the Sharing Gardens. Saturday, April 21 - 9:00 to noon at the Monroe garden site. We've grown over 3,000 starts in our new greenhouse! Many of these will be planted in our own plots but we have purposely grown extra to share. We also have packaged up many of the seeds we've saved and these will be available too. All seeds and starts are free for anyone not going to sell their produce. Donations also gladly accepted. We will have lettuces, broccoli and kale. More to follow in a few weeks. Later in the Spring we will have flowers, tomatoes and other starts to share as well. If you have any empty nursery pots or flats you can bring them for us to re-use. 

The Monroe Sharing Garden is behind the Methodist Church - 648 Orchard St. Turn into the parking lot and head straight back. Look for the sign and shed below (you can't see the greenhouse from the parking lot).